How to Change the Heating Element on a Camper Water Heater
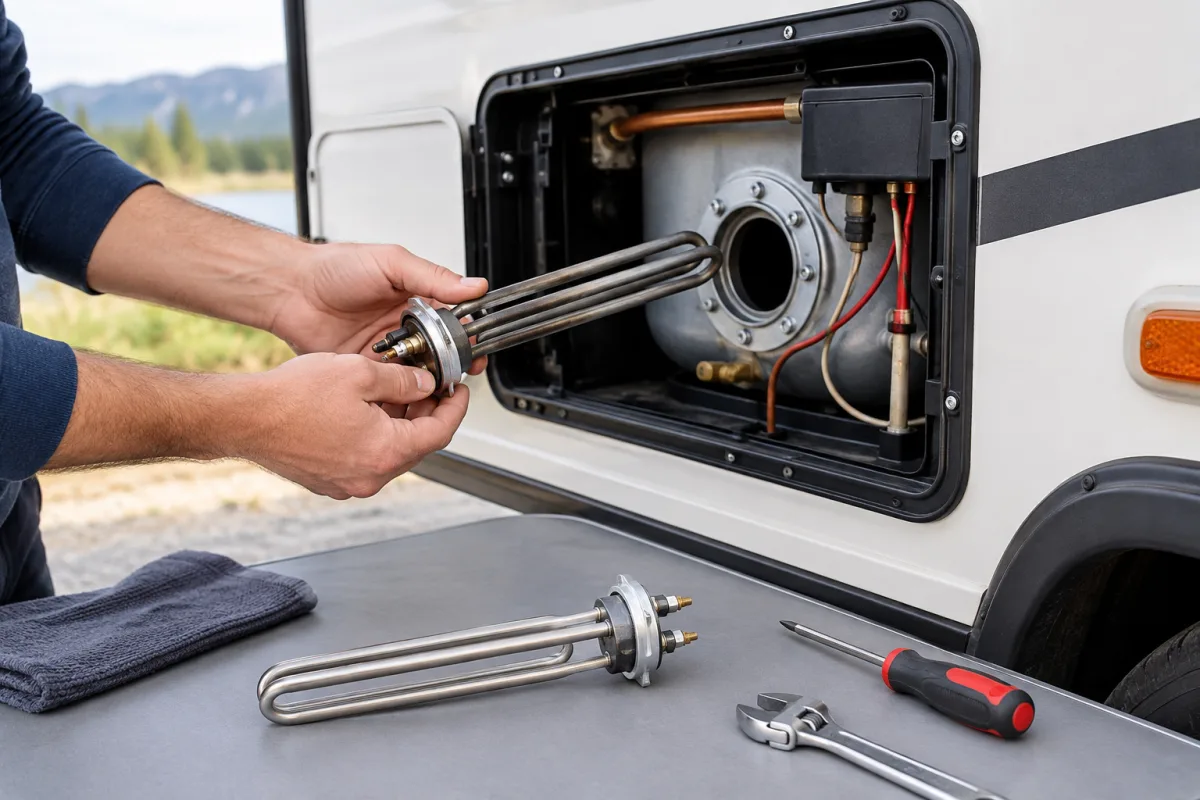
Replacing the electric heating element in a camper water heater is usually a manageable repair, but the correct procedure depends on the heater’s manufacturer, model, voltage, wattage, and element design. The most common systems are combination propane/electric water heaters from Atwood/Dometic and Suburban.
Before ordering a part, identify the model number and determine whether the heater uses a screw-in element or a bolt-on, four-bolt element. These designs are not interchangeable.
Safety precautions before starting
- Turn off the water heater.
- Disconnect shore power and switch off the RV breaker supplying the heater.
- Disconnect 12-volt DC power before servicing the unit.
- Turn off the propane supply if you will work near gas components.
- Allow the water to cool completely.
- Turn off the city-water connection and the water pump.
- Open a hot-water faucet to relieve pressure.
Never energize the heating element while the tank is empty. A dry tank can destroy the new element and may damage the water heater.
Identify the correct replacement element
Atwood/Dometic combination water heaters may use either a flanged element secured by four bolts or a screw-in element. Some current-style screw-in elements are rated at approximately 1,400 watts, while some older models use 1,500-watt elements. The voltage, wattage, thread or flange design, and gasket must match the original specification.
Suburban water heaters also have model-specific parts and service procedures. Check the identification label and the exact owner or service manual before removing anything. Torque specifications and access arrangements vary by model.
How to replace a screw-in heating element
- Drain the tank. With the water cool and the supply turned off, open a hot-water faucet and drain the tank using the heater’s drain outlet. Keep clear of the water because residual pressure or heat may remain.
- Expose the element. Remove the access cover or insulation necessary to reach the element and its wiring.
- Record the wiring position. Photograph or label the two power wires before disconnecting them.
- Disconnect the wires. Confirm that the circuit is de-energized, then remove the wires from the element terminals.
- Remove retaining hardware if fitted. Some installations include additional hardware around the element.
- Unscrew the old element. Use the correctly sized heating-element socket or a suitable deep socket. Avoid damaging the tank fitting.
- Remove the old gasket. Make sure no pieces remain on the sealing surface.
- Clean the sealing area. Remove scale and residue carefully without scratching or deforming the tank surface.
- Install the new element and gasket. Use the correct replacement gasket, start the element by hand to prevent cross-threading, and tighten it according to the manufacturer’s instructions. Do not apply excessive force.
- Reconnect the wires. Install each wire exactly as it was positioned on the original element.
How to replace a bolt-on element
- Drain the tank and verify that the power is off.
- Disconnect and label the two element wires.
- Remove the four mounting bolts evenly.
- Take out the old element and gasket.
- Clean the tank’s sealing surface without damaging it.
- Fit the correct replacement element with a new compatible gasket.
- Install and tighten the bolts evenly using the manufacturer’s specified procedure.
- Reconnect the wires in their original positions.
Do not substitute a screw-in element for a four-bolt element or attempt to modify the mounting arrangement. A mismatched part may leak or fail to seal correctly.
Refill and test the water heater
- Close the drain outlet.
- Turn on the city-water supply or water pump.
- Open a hot-water faucet until water flows steadily without air.
- Inspect the element and gasket area for leaks.
- Only after the tank is completely full and purged of air, restore electrical power.
- Run the electric heating mode and check that the water heats normally.
If a leak appears, switch off the power and water supply before correcting it. Do not leave the element energized while investigating a dry or leaking tank.
Testing a suspected failed element
An element that tests open for continuity is defective. An element that shows a short between a terminal and its metal flange is also defective. If the replacement element fails again, inspect the thermostat, ECO or high-limit device, wiring, breaker, and ground connection instead of repeatedly installing new elements.
When professional RV service is the safer option
Model uncertainty, damaged wiring, persistent leaks, seized elements, or problems involving both electric and propane operation are good reasons to use a qualified RV technician. Suburban service guidance emphasizes disconnecting both 120-volt AC and 12-volt DC power, shutting off the water supply, and draining the tank before internal service.
Custom way repairs and renovates RVs and camper vans in California, including electrical repair and water damage repair. The company serves Orange County, Los Angeles, and Riverside County, with a location at 17223 Roseton Ave, Artesia 90701. If the element is difficult to access or the heater has additional electrical or water-system faults, contact Custom way at +1 840-205-7314 or customway.ca@gmail.com to arrange RV service.