
Installing a bike rack on a motorhome is a great way to bring bicycles along for trips. However, motorhomes are not the same as passenger vehicles. Weight distribution, rear overhang, frame strength, and wall construction all matter.
Below is a clear, step-by-step guide explaining how to install a bike rack properly and safely.
Step 1. Choose the Right Type of Bike Rack
There are three common options:
1. Hitch-Mounted Rack
-
Installs into a rear hitch receiver
-
Most secure option
-
Best for heavier bikes or e-bikes
2. Ladder-Mounted Rack
-
Attaches to rear ladder
-
Suitable only for lightweight bikes
-
Limited weight capacity
3. Bumper-Mounted Rack
-
Bolts to steel bumper
-
Only safe if bumper is reinforced
-
Not recommended for heavy loads
For most motorhomes, a hitch-mounted rack is the safest option.
Step 2. Check Weight Ratings
Before installation, verify:
-
Hitch receiver rating
-
Motorhome rear axle weight limit
-
Rack weight capacity
-
Total weight of bikes
Motorhomes often have long rear overhang. Extra weight at the back increases leverage and stress on the frame.
If you plan to carry e-bikes, you must confirm capacity.
Step 3. Inspect the Hitch Receiver
If your motorhome already has a rear hitch:
-
Check mounting bolts
-
Inspect welds
-
Look for rust or cracks
-
Confirm receiver size (usually 2 inch)
If there is no hitch, a frame-mounted receiver must be installed professionally.
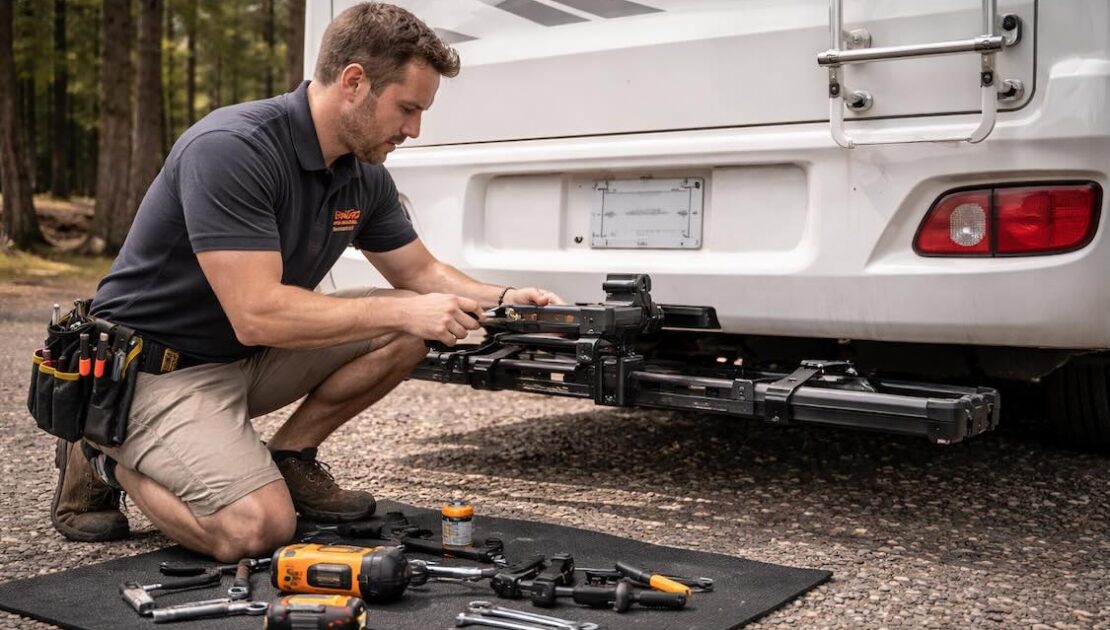
Step 4. Install the Hitch Rack
-
Insert rack into hitch receiver
-
Align pin holes
-
Insert hitch pin and secure clip
-
Tighten anti-wobble bolt if included
-
Test for movement
A properly installed rack should not sway or rattle excessively.
Step 5. Secure the Bikes Properly
-
Use frame clamps or wheel trays
-
Strap wheels securely
-
Add secondary safety strap
-
Ensure pedals do not contact the motorhome body
Double check clearance with rear camera and tail lights.
Step 6. Test Rear Clearance
Before driving:
-
Check ground clearance on slopes
-
Confirm rack does not block tail lights
-
Make sure license plate remains visible
-
Test rear camera view
Long motorhomes can drag racks on steep driveways.
Step 7. Drive Carefully
Extra weight at the rear affects:
-
Handling
-
Braking distance
-
Suspension load
Drive slower on uneven roads and inspect rack regularly.
Common Mistakes to Avoid
-
Mounting to weak bumper
-
Ignoring hitch rating
-
Overloading with e-bikes
-
Blocking rear lights
-
Skipping anti-wobble hardware
-
Installing into wall without frame support
Never screw racks directly into fiberglass walls.
When Professional Installation Is Recommended
Professional installation is best if:
-
You need a new hitch installed
-
You carry heavy e-bikes
-
Your bumper needs reinforcement
-
You want a custom frame-mounted solution
-
You are unsure about rear weight limits
Incorrect installation can damage the frame or cause rack failure while driving.
We Can Help!
If you need a bike rack installed on your motorhome, Custom-way can help.
We understand:
-
Motorhome frame structures
-
Hitch reinforcement
-
Weight distribution
-
Secure mounting solutions
We can install or reinforce your hitch properly so your bikes stay safe on every trip.
📞 +1 840-205-7314
✉️ customway.ca@gmail.com