
If you’re tired of noisy rooftop air conditioners or inefficient cooling, upgrading to a mini split system in your RV can completely change your comfort level. Mini splits are quiet, energy-efficient, and powerful enough to cool or heat your RV year-round. But installation requires some planning and the right setup. Here’s how it works and what you should know before getting started.
What Is a Mini Split System?
A mini split system is a compact heating and cooling system that consists of two main parts:
-
An outdoor condenser (mounted outside the RV) that compresses and cools refrigerant.
-
An indoor air handler (mounted inside) that blows the conditioned air.
The two are connected by refrigerant lines, drain tubing, and electrical wiring.
Why Choose a Mini Split for an RV?
-
Ultra-quiet operation – No more loud roof units.
-
High efficiency – Inverter technology saves power, ideal for solar setups.
-
Compact and powerful – Great for large or full-time RV living.
-
Dual function – Provides both heating and cooling.
How to Install a Mini Split in an RV?
1. Plan the Location
-
Choose a place for the indoor unit (usually on an interior wall or above the bed/living area).
-
The outdoor condenser can be mounted on the rear bumper, tongue, or under the chassis using a custom bracket.
-
Make sure airflow around the outdoor unit is not blocked.
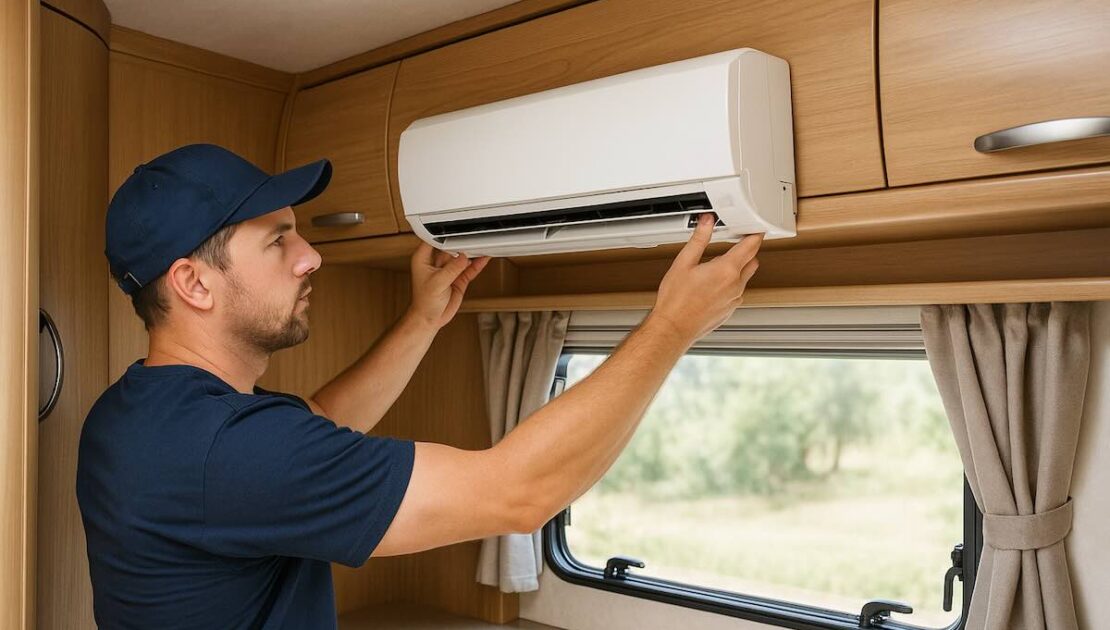
2. Mount the Indoor Unit
-
Use the supplied wall bracket to mark and drill holes.
-
Cut a 2–3 inch hole for refrigerant lines and electrical cables to pass through the wall.
-
Secure the indoor unit and connect the lines through the opening.
3. Install the Outdoor Condenser
-
Mount the condenser securely using vibration-damping brackets or a welded frame.
-
Ensure there’s enough clearance for ventilation.
-
Connect the refrigerant lines and electrical wiring from the indoor unit.
4. Connect the Refrigerant Lines
-
Carefully bend and attach the pre-charged lines according to manufacturer instructions.
-
Avoid kinks or sharp bends — they can cause leaks or restrict flow.
-
Seal the wall opening with foam and weatherproof sealant.
5. Power and Drain Setup
-
Connect the system to a dedicated 120V or 240V electrical circuit (depending on model).
-
Route the condensate drain line downward from the indoor unit to the exterior of the RV.
6. Test and Commission the System
-
Once all connections are made, test the unit for leaks and power on.
-
Set your desired temperature and check both cooling and heating modes.
Important Tips
-
Most mini split units require professional refrigerant handling, so it’s best to have an RV service technician or licensed HVAC specialist complete the final connections.
-
Always consider weight distribution before mounting the condenser.
-
Use vibration isolators to reduce noise when driving.
Installing a mini split in your RV is one of the best upgrades for comfort and energy efficiency, especially if you spend long periods traveling or camping in hot climates. With proper installation, your RV will stay cool and quiet — without the heavy draw of rooftop AC units.
For professional RV modifications, electrical upgrades, and climate control installations, contact Custom-way in Artesia, CA. We specialize in RV remodeling, electrical systems, roof repair, and A/C installations.
Call +1 840-205-7314 or email customway.ca@gmail.com to schedule your appointment.