
Installing a soft start on your RV air conditioner is one of the best upgrades you can make. It reduces the startup surge, allows your AC to run on smaller generators, and helps prevent breaker trips at campgrounds. Many RV owners install soft starts so they can run AC on 30-amp service, generators, or inverter setups.
Below is a clear, practical guide explaining how it’s done and when it makes sense to call professionals.
What Is a Soft Start and Why You Need It?
A soft start is an electronic module that gradually ramps up the AC compressor instead of starting it at full power instantly.
Benefits:
-
Reduces startup amps by 50–70 percent
-
Allows AC to run on smaller generators
-
Prevents tripped breakers
-
Extends compressor life
-
Reduces lights dimming at startup
This is especially useful for rooftop RV AC units like Dometic or Coleman.
What You Need Before Installation:
-
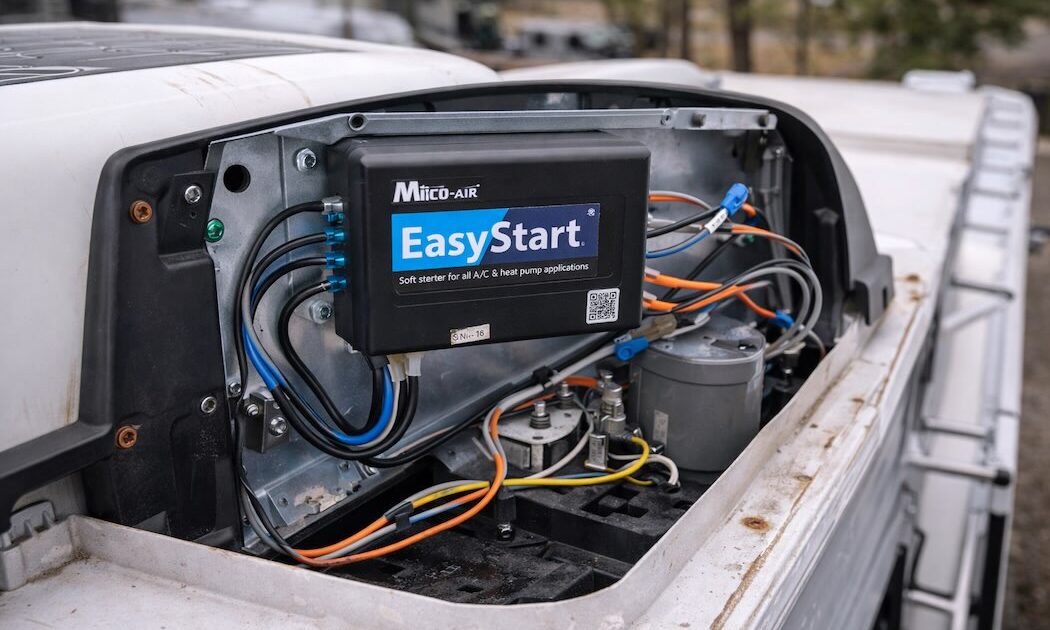
RV soft start kit (Micro-Air EasyStart or similar)
-
Screwdrivers
-
Nut driver or socket set
-
Wire connectors or crimp tool
-
Electrical tape
-
Multimeter (recommended)
-
Ladder and safety gloves
Important: Make sure the soft start model is compatible with your AC unit.
Step 1. Disconnect All Power
This is critical.
-
Unplug shore power
-
Turn off the generator
-
Turn off the inverter
-
Disconnect the RV battery (optional but recommended)
Never work on the AC with power connected.
Step 2. Access the Rooftop AC Electrical Box
-
Climb onto the roof safely.
-
Remove the AC shroud (plastic cover).
-
Locate the electrical control box on the side of the unit.
-
Remove the metal cover to expose wiring and capacitors.
Be careful. Capacitors can hold a charge even after power is off.
Step 3. Identify the Required Wires
Most soft starts connect to:
-
Compressor
-
Start capacitor
-
Run capacitor
-
Control board (on newer units)
Each soft start brand provides a wiring diagram. Follow it exactly.
Wire colors may differ by manufacturer, so do not rely on color alone.
Step 4. Install the Soft Start Module
-
Mount the soft start inside the electrical compartment
-
Secure it so it cannot vibrate or rub against sharp edges
-
Connect wires according to the diagram
-
Double-check all connections
Loose connections can damage the compressor.
Step 5. Reassemble and Power Up
-
Reinstall the electrical cover
-
Reinstall the AC shroud
-
Restore power to the RV
Step 6. Learning Cycles (Very Important)
Most soft starts require 3–5 AC start cycles to fully program themselves.
-
Turn the AC on and let it run for at least 30 seconds
-
Turn it off
-
Repeat several times
Each cycle improves startup performance.
Mistakes to Avoid:
-
Skipping power disconnect
-
Mounting the soft start loosely
-
Incorrect wire connections
-
Blocking ventilation inside the electrical box
-
Forgetting the learning cycles
When You Should Call Professionals?
Soft start installation is not complicated, but RV AC wiring is tight, cramped, and model-specific. A wiring mistake can destroy a compressor that costs far more than the soft start itself.
We can help!
You can call Custom-way and we will install the soft start correctly.
We understand RV AC electrical layouts, capacitors, control boards, and rooftop access, and we can safely reach all internal components without damaging the unit or roof.
📞 +1 840-205-7314
✉️ customway.ca@gmail.com