
RV skirting is one of the most effective upgrades for cold weather camping. It blocks wind from flowing under the RV, helps retain heat, protects plumbing from freezing, and improves overall comfort in winter. Installing RV skirting correctly makes a big difference in how well it works.
Below is a clear, practical guide that RV owners actually use.
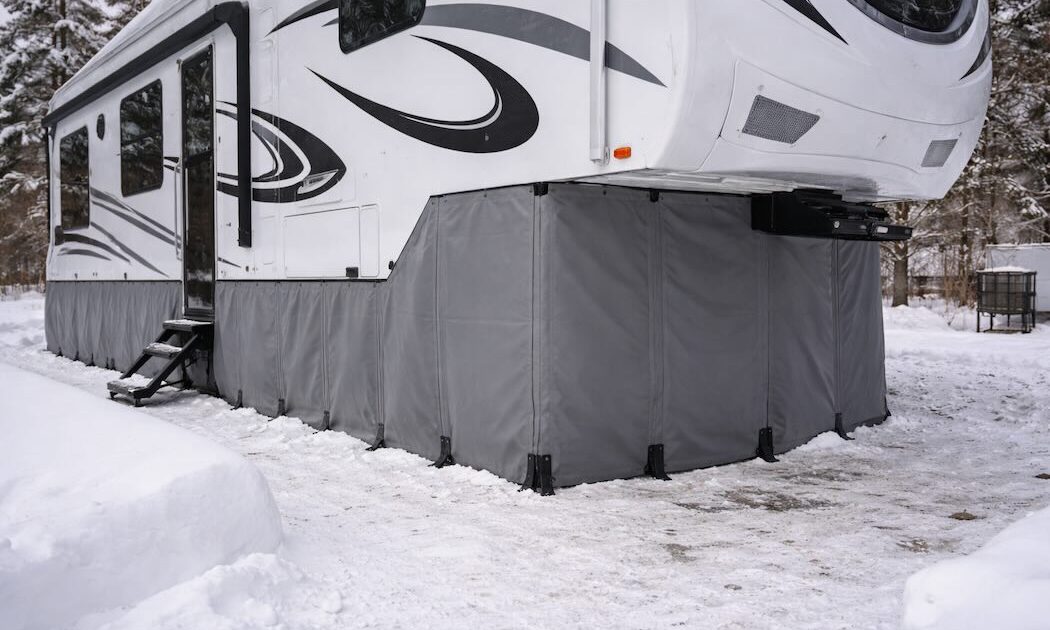
What Is RV Skirting and Why You Need It?
RV skirting is a barrier installed around the lower perimeter of your RV, sealing the gap between the ground and the RV body.
It helps to:
-
Reduce heat loss through the floor
-
Prevent frozen water lines and tanks
-
Protect the underbelly from wind and snow
-
Lower heating costs
-
Improve comfort during winter stays
RV skirting is especially useful for full-time RV living or long stays in cold climates.
Types of RV Skirting:
Before installing, choose the right type.
Vinyl RV Skirting
-
Custom-fit or semi-custom
-
Durable and reusable
-
Best long-term solution
-
Higher cost but best performance
Foam Board Skirting
-
Rigid insulation panels
-
Affordable DIY option
-
Excellent insulation value
-
Bulky to store
Fabric or Insulated Fabric Skirting
-
Lightweight and flexible
-
Faster to install
-
Moderate insulation
Tools and Materials You May Need
-
Measuring tape
-
Marker
-
Utility knife or scissors
-
Drill or screwdriver
-
Snaps, turn buttons, or adhesive fasteners
-
Ground stakes or weights
-
Weather-resistant tape or sealant (optional)
Step 1. Measure the RV Perimeter
Measure:
-
Length of each side
-
Height from the ground to the RV body
-
Note slide-outs, steps, and storage doors
Accurate measurements prevent gaps that let cold air in.
Step 2. Prepare the RV Surface
-
Clean the lower RV body where fasteners will attach
-
Remove dirt, wax, and moisture
-
Make sure the surface is dry
Good surface prep ensures fasteners stay secure.
Step 3. Install Attachment Points
Depending on the skirting type:
-
Snap systems or turn buttons are mounted to the RV body
-
Adhesive tracks may be used on some systems
-
For foam board, panels may rest against the RV without body fasteners
Install fasteners evenly to avoid sagging.
Step 4. Attach the Skirting Panels
-
Start at one corner and work your way around
-
Keep panels tight but not overstretched
-
Overlap sections slightly to block wind
For foam board:
-
Cut panels to size
-
Tape seams tightly
-
Seal gaps with foam or weather tape
Step 5. Secure the Bottom Edge
This step is critical.
Options include:
-
Ground stakes
-
Weights or sandbags
-
Snow, gravel, or boards along the bottom edge
The goal is to prevent wind from lifting the skirting.
Step 6. Seal Gaps and Openings
Check around:
-
Wheels
-
Steps
-
Utility hookups
-
Slide-outs
Seal gaps with foam insulation, towels, or weather stripping.
Step 7. Check Airflow and Safety
-
Do not block furnace exhaust vents
-
Do not trap propane fumes
-
Ensure access panels can still be opened if needed
Proper airflow prevents moisture buildup and safety issues.
Common Mistakes to Avoid
-
Leaving gaps near the ground
-
Blocking exhaust vents
-
Using weak fasteners
-
Skirting too tight or too loose
-
Ignoring access points for maintenance
RV skirting is one of the best winter upgrades you can make. When installed correctly, it dramatically improves warmth, protects plumbing, and makes cold weather RV living far more comfortable.
We Can Help!
If you want RV skirting installed correctly and safely, you can contact Custom-way.
We understand RV body construction, underbelly layouts, exhaust routing, and access points. We can install skirting without damaging panels, wiring, or plumbing, and ensure it works effectively in real winter conditions.
📞 +1 840-205-7314
✉️ customway.ca@gmail.com