
Painting a motorhome is a serious project that affects not only appearance but also resale value and long-term protection of the body. Unlike cars, motorhomes have large flat panels, multiple materials, seams, and roof transitions. A rushed or poorly prepared paint job usually starts peeling within one or two seasons.
This guide explains how motorhome painting is actually done in practice, not in quick DIY videos.
Decide whether painting makes sense
Before starting, evaluate the condition of the motorhome.
Painting is justified if:
-
clear coat is failing
-
paint is badly faded or chalky
-
previous repairs look mismatched
-
exterior graphics are damaged
If the body has structural issues, leaks, or corrosion, those must be fixed before any paint work.
Choose the right painting method
There are three realistic approaches to painting a motorhome.
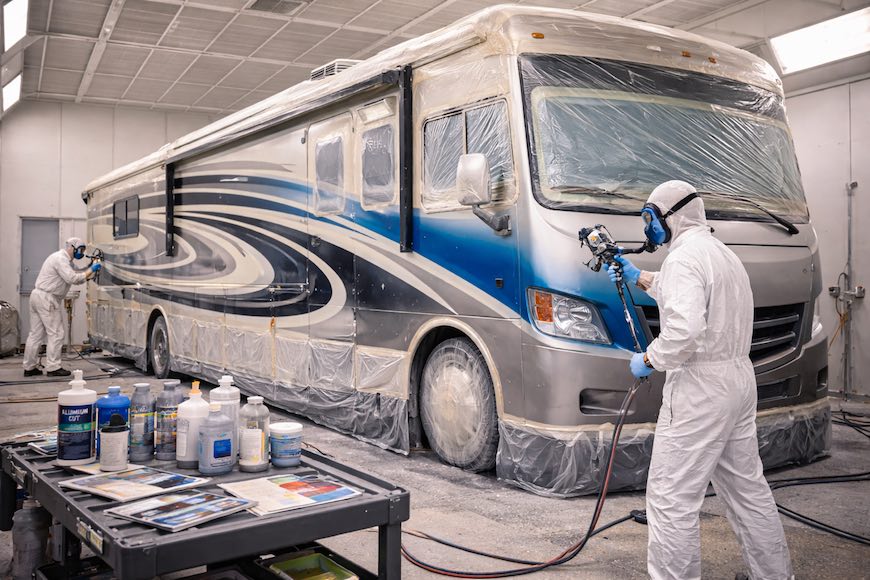
Professional spray booth paint job
Best quality and durability. Requires full masking, controlled environment, and professional equipment.
Mobile spray painting
Good compromise for large motorhomes. Quality depends heavily on preparation and weather conditions.
Roll-and-tip or brush methods
Used mostly for budget builds or utility rigs. Can look acceptable from a distance but requires patience and skill.
Spray painting gives the most consistent finish, especially on large flat panels.
Surface preparation is the most important step
Most paint failures come from poor prep, not bad paint.
Preparation includes:
-
deep wash and degreasing
-
removing wax and oxidation
-
sanding existing paint evenly
-
repairing cracks, chips, and dents
-
sealing seams and edges
Skipping prep saves time now and costs much more later.
Masking and disassembly
Motorhomes have many components that should not be painted.
Usually masked or removed:
-
windows and seals
-
lights and reflectors
-
vents and access doors
-
trim and badges
Good masking takes time but defines the final result.
Primer selection and application
Primer choice depends on surface material.
Common surfaces:
-
fiberglass
-
aluminum
-
painted steel
-
plastic components
Using the wrong primer causes peeling or bubbling. Primer also reveals surface imperfections that must be corrected before color.
Choosing the right paint
Automotive-grade paints are strongly recommended.
Common options:
-
single-stage polyurethane
-
basecoat with clear coat
-
industrial marine coatings
Marine and polyurethane paints handle UV exposure better on large RV surfaces.
Painting process
Painting a motorhome is done in sections, not all at once.
General approach:
-
apply thin, even coats
-
maintain consistent spray distance
-
overlap passes evenly
-
allow proper flash time between coats
Rushing this step leads to runs, dry spray, and uneven gloss.
Curing and finishing
After painting, the surface must cure properly.
Curing includes:
-
controlled drying time
-
avoiding moisture and dust
-
light sanding if needed
-
final polishing after full cure
Polishing too early can damage fresh paint.
Common painting mistakes
Most failed paint jobs involve:
-
painting over oxidation
-
poor seam sealing
-
incorrect primer
-
painting in wind or humidity
-
uneven sanding
Large RV panels exaggerate every mistake.
Professional motorhome painting by Custom-way
For owners who want a durable, even finish, Custom-way provides professional motorhome painting and exterior refurbishment.
Custom-way focuses on:
-
proper surface preparation
-
correct paint systems
-
seam and edge durability
-
long-term UV protection
A correctly painted motorhome should last many years without peeling or fading.
Painting a motorhome is closer to painting a boat than a car. Surface preparation, material compatibility, and patience matter more than speed. When done correctly, a quality paint job transforms the motorhome and protects it long term.