
Installing Starlink in an RV gives you fast and reliable internet anywhere, but one of the most common challenges is routing the Starlink cable through the RV wall safely. If done incorrectly, you can damage insulation, wiring, or cause water leaks. Here is the correct and safe way to do it.
Step 1. Choose the Right Entry Point
Before drilling anything, locate a safe wall area:
-
Near existing cable or utility entry points
-
Inside a cabinet or storage compartment
-
Close to the router location inside the RV
Avoid drilling near:
-
Electrical panels
-
Slide-out mechanisms
-
Plumbing lines
-
Structural framing without inspection
Tip: Interior cabinets are often the safest access points because they hide cables and give you room to work.
Step 2. Check What Is Inside the Wall
RV walls are thin but complex. They often contain:
-
Electrical wiring
-
Insulation
-
Aluminum or wood framing
Use:
-
A stud finder with wire detection
-
Small inspection hole (if needed)
-
Access panels or adjacent compartments
Never drill blindly.
Step 3. Drill the Hole Correctly
-
Use a small pilot hole first
-
Final hole size should be just large enough for the Starlink connector
-
Drill slowly to avoid tearing the wall material
Most Starlink cables require a hole of about 3/4 inch to 1 inch, depending on the connector generation.
Step 4. Protect the Cable and Wall
This step is critical.
-
Install a rubber grommet or cable gland in the hole
-
This prevents:
-Cable damage from vibration
-Water intrusion
-Air leaks and condensation
Never run the cable directly through bare wall material.
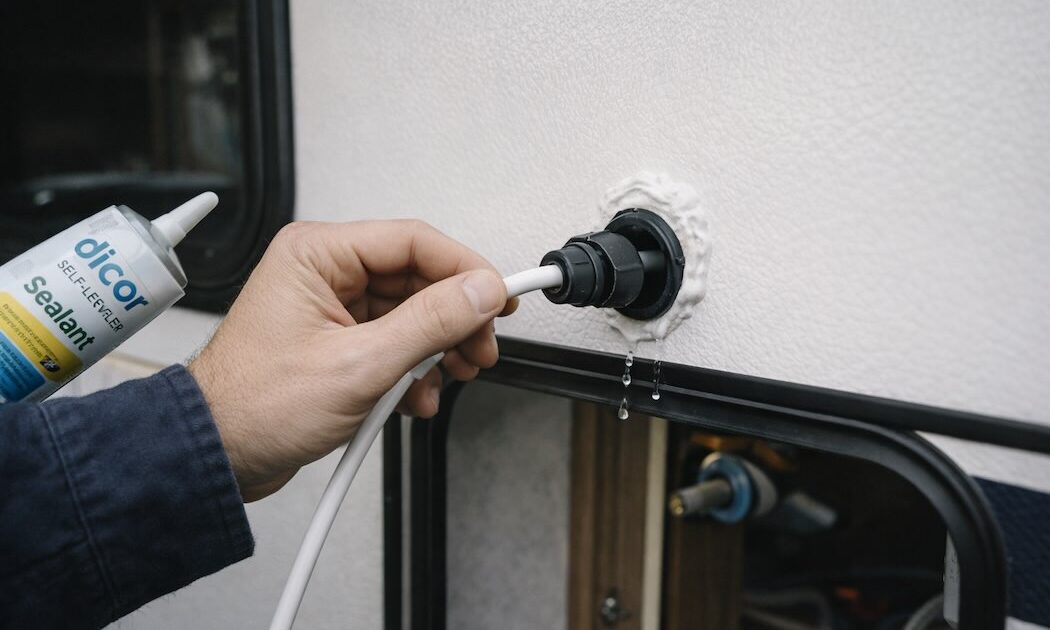
Step 5. Seal the Exterior Properly
On the outside wall:
-
Apply RV-grade sealant (Dicor or Sikaflex)
-
Seal around the cable gland or grommet
-
Make sure the sealant stays flexible after curing
Do not use household silicone. It cracks and fails on RV walls.
Step 6. Secure the Cable Inside the RV
Inside the RV:
-
Route the cable neatly along walls or cabinets
-
Use cable clamps or adhesive mounts
-
Avoid sharp bends or pinch points
Keep the cable away from heat sources and moving components.
Step 7. Test Before Finalizing
Before closing panels:
-
Power on Starlink
-
Check connection stability
-
Confirm no cable strain when slides move or doors close
Only after testing should you fully secure everything.
Common Mistakes to Avoid!
-
Drilling through the exterior wall without checking inside
-
Skipping the grommet or cable gland
-
Using the wrong sealant
-
Routing the cable near slide-outs
-
Leaving the cable loose and unsupported
When It Is Better to Call Professionals?
If you are unsure where to drill or how your RV walls are constructed, it is safer to call professionals.
We can help
You can contact Custom-way and we will install it correctly.
We know RV wall construction, wiring paths, insulation layers, and structural zones, and we can safely access any internal cavity without damaging your RV.
📞 +1 840-205-7314
✉️ customway.ca@gmail.com