
Refurbishing an Airstream trailer is not a cosmetic refresh. It is a structured process that combines structural inspection, mechanical updates, and interior restoration. Airstream trailers are built from aluminum and riveted construction, which allows them to be refurbished rather than replaced, but only if the work is done in the correct order.
This guide explains how Airstream refurbishment is usually approached in real projects, not show builds.
Start with inspection and planning
Before removing a single panel, the trailer must be evaluated as a whole.
Key areas to inspect:
-
frame and suspension
-
floor condition and soft spots
-
aluminum shell and rivets
-
roof seams and vents
-
wiring and plumbing age
Many problems are hidden under cabinets and flooring. Skipping inspection often leads to rebuilding the same area twice.
Structural and safety repairs first
Refurbishment always starts with what keeps the trailer safe on the road.
Typical early-stage work includes:
-
axle and brake service
-
bearing replacement
-
suspension bushings
-
frame corrosion repair
-
floor reinforcement
Interior upgrades make no sense if the trailer is not roadworthy.
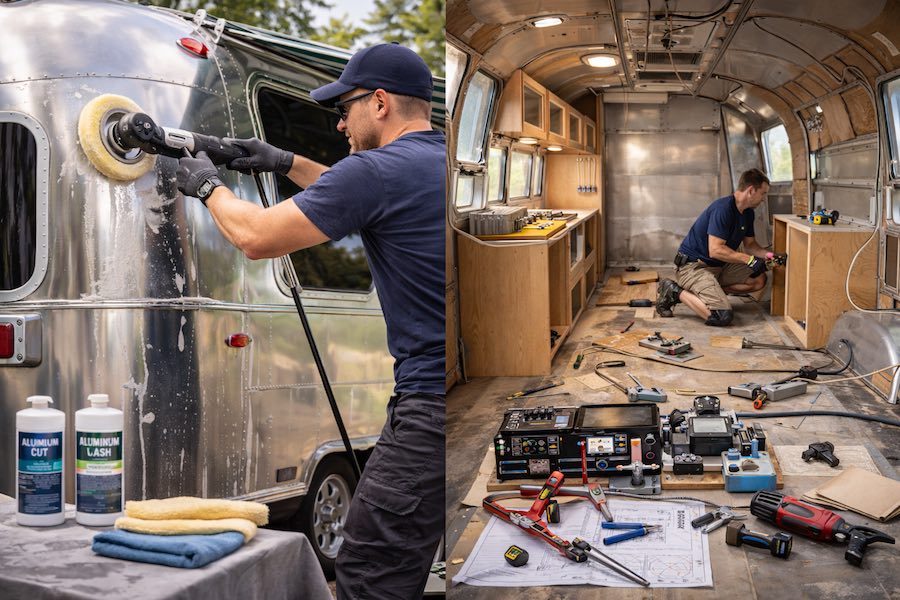
Exterior aluminum restoration
Once structure is solid, attention moves to the aluminum shell.
Common exterior refurbishment tasks:
-
deep wash and oxidation removal
-
polishing aluminum panels
-
resealing windows and roof seams
-
replacing damaged rivets
-
repairing dents where possible
Exterior sealing is critical. Many interior water damage issues start outside.
Electrical system modernization
Older Airstreams often have outdated or unsafe electrical systems.
Refurbishment usually includes:
-
replacing old wiring
-
installing modern breaker panels
-
upgrading converters and inverters
-
adding USB and modern outlets
-
improving grounding
This step is essential if solar, lithium batteries, or modern appliances are planned.
Plumbing and water systems
Plumbing should be addressed before new walls or cabinets are installed.
Typical updates:
-
replacing old water lines
-
installing modern water pumps
-
upgrading water heaters
-
inspecting gray and black tanks
-
adding leak access points
Old fittings often fail shortly after refurbishment if not replaced.
Interior rebuild and insulation
Interior work is what most people associate with refurbishment, but it comes later in the process.
Interior refurbishment may include:
-
new insulation
-
wall panel replacement
-
flooring installation
-
cabinet rebuilding
-
lighting upgrades
Good insulation dramatically improves comfort and reduces condensation.
Appliances and systems integration
Only after structure, wiring, and plumbing are complete should appliances be installed.
This includes:
-
refrigerator
-
heater or AC
-
cooktop or oven
-
ventilation fans
Installing appliances too early increases the risk of damage during later work.
Cosmetic finishing and details
The final stage focuses on usability and appearance.
Typical finishing work:
-
upholstery
-
curtains or blinds
-
trim and seals
-
hardware replacement
At this point, all systems should already be tested and operational.
Common refurbishment mistakes
Most failed refurbishments share the same problems:
-
skipping structural repairs
-
hiding water damage
-
restoring interior before wiring
-
sealing over corrosion
-
underestimating time and cost
Airstream refurbishment rewards patience and planning.
Professional Airstream refurbishment by Custom-way
For owners who want reliable results without costly mistakes, Custom-way provides full and partial Airstream refurbishment services.
Custom-way focuses on:
-
correct work sequence
-
structural safety
-
aluminum preservation
-
modern system integration
This approach keeps the trailer usable, safe, and valuable long term.
Practical guidance
Refurbishing an Airstream trailer is closer to restoring a classic aircraft than renovating a house. Every stage affects the next one. When done in the right order, an Airstream can serve reliably for decades without losing its original character.