
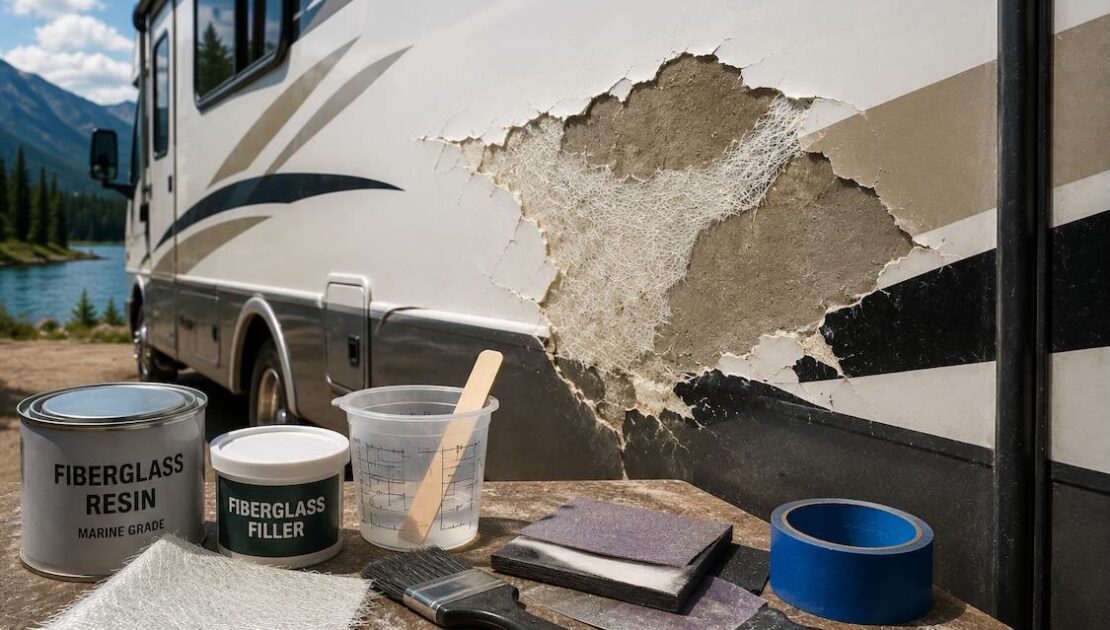
How to Repair RV Fiberglass Exterior Damage
Fiberglass exterior panels are common on many RVs, motorhomes, campers, and travel trailers because they are lightweight, smooth, and good-looking when properly maintained. But fiberglass is not indestructible. Road debris, tree branches, parking mistakes, hail, sun exposure, and water intrusion can leave cracks, chips, dents, scratches, or soft damaged areas.
Some small cosmetic fiberglass damage can be repaired with the right materials and patience. Larger damage, delamination, deep cracks, or water-damaged wall sections usually need professional repair.
The most important thing is to understand what kind of damage you are dealing with before you start sanding or applying filler.
 Common Types of RV Fiberglass Exterior Damage:
RV fiberglass damage can look simple on the surface, but the real problem may be deeper.
Common exterior damage includes:
- Surface scratches
- Gelcoat cracks
- Rock chips
- Small holes
- Spider cracks
- Impact cracks
- Fiberglass panel dents
- Delamination
- Water-damaged wall sections
- Cracks around windows, trim, and compartments
A small scratch is mostly cosmetic. A deep crack that reaches the fiberglass layer can allow water inside the wall. A soft or bubbled area may mean delamination, which is a more serious issue.
First Step
Inspect the Damage Carefully
Before repairing anything, clean the area and inspect it in good light.
Look for:
- Cracks spreading from the impact point
- Loose fiberglass
- Soft areas around the damage
- Water stains
- Bulging or bubbling panels
- Separation around seams
- Damaged sealant nearby
- Gaps around windows, trim, lights, or storage doors
Press gently around the damaged area. If the wall feels soft, hollow, or separated from the backing, the repair is not just a surface patch. The panel may be delaminated or the backing material may be damaged.
Surface Scratch vs Deep Fiberglass Damage
Not all damage needs the same repair.
A light scratch may only need cleaning, polishing, and gelcoat correction.
A deeper gouge may need filler, sanding, primer, and paint.
A crack or hole may need fiberglass cloth or mat, resin, filler, sanding, and refinishing.
A soft wall or bubbled exterior usually means the structure behind the fiberglass needs attention.
This difference matters because applying filler over a structural problem will not fix the wall. It only hides the damage for a short time.
Tools and Materials You May Need
For small fiberglass exterior repairs, you may need:
- Safety glasses
- Gloves
- Respirator or dust mask
- Cleaner and degreaser
- Sandpaper in several grits
- Fiberglass resin
- Fiberglass cloth or mat
- Body filler suitable for fiberglass
- Plastic spreaders
- Painter’s tape
- Primer
- Matching paint or gelcoat
- Polishing compound
- RV-safe sealant if seams or trim are involved
Always work in a ventilated area. Fiberglass dust and resin fumes are not something you want to breathe.
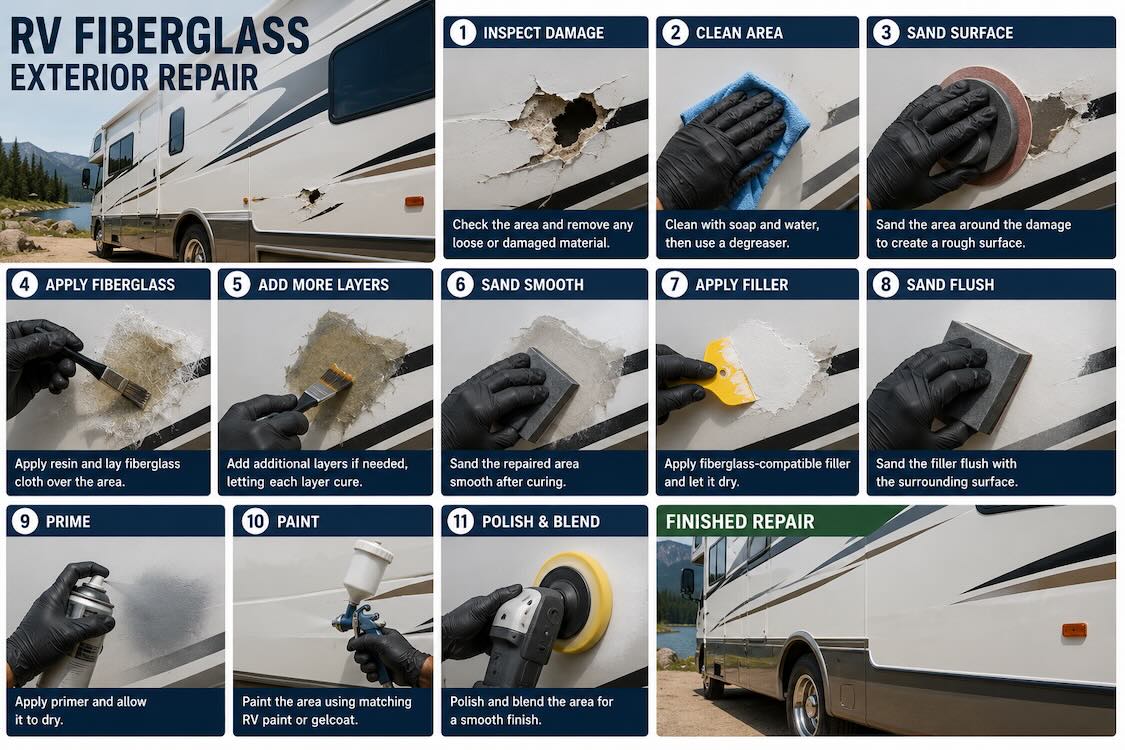
Step 1
Clean the Damaged Area
Start by washing the damaged area with soap and water. Remove dirt, wax, grease, road film, and old polish.
After the area is dry, use a proper cleaner or degreaser before sanding. Repair materials do not bond well to dirty or waxed surfaces.
Do not skip this step. Poor surface preparation is one of the main reasons fiberglass repairs fail.
Step 2
Sand Around the Damage
Sand the damaged area to remove loose material and create a rough surface for bonding.
For cracks, sand slightly beyond the visible damage. For holes or deeper impact areas, feather the edges so the repair transitions smoothly into the original surface.
The goal is to remove weak material and give the resin, cloth, or filler a solid surface to grip.
Be careful not to sand too aggressively into surrounding good fiberglass.
Step 3
Repair Cracks or Holes With Fiberglass
For deep cracks, holes, or broken fiberglass, filler alone is usually not enough. You need reinforcement.
A basic fiberglass repair usually includes:
- Sanding the damaged area
- Cutting fiberglass cloth or mat to size
- Mixing resin according to instructions
- Applying resin to the repair area
- Laying fiberglass cloth into the resin
- Adding more resin to fully wet the cloth
- Letting it cure completely
- Sanding the repaired area smooth
For deeper repairs, several layers may be needed. Each layer should be built carefully, not rushed.
Step 4
Apply Fiberglass-Compatible Filler
After the reinforced repair cures, use fiberglass-compatible filler to smooth the surface.
Apply thin layers instead of one thick lump. Thick filler can shrink, crack, or become hard to shape.
After curing, sand the filler smooth and feather the edges into the surrounding panel.
A good repair should feel smooth to the touch before primer or paint is applied.
Step 5
Prime and Refinish the Area
Once the surface is smooth, apply primer suitable for fiberglass and exterior use.
After primer, the area can be painted or finished with gelcoat depending on the RV exterior type.
Color matching can be difficult, especially on older RVs where the exterior has faded from sun exposure. Even if you use the correct paint code, the new finish may look slightly different from the aged surrounding surface.
This is one reason larger visible repairs are often better handled by professionals.
Step 6
Polish and Blend
After the paint or gelcoat has cured properly, the repaired area may need wet sanding, polishing, and blending.
This step helps reduce the visual difference between the repair and the original exterior.
For small repairs, careful polishing can make the result look much cleaner. For larger panels, professional refinishing may be needed to avoid a patchy look.
What About RV Fiberglass Delamination?
Delamination is different from a crack or chip.
RV fiberglass delamination happens when the outer fiberglass skin separates from the backing material. It may look like a bubble, wave, soft spot, or raised area on the side wall.
Common causes include:
- Water intrusion
- Failed sealant
- Window leaks
- Roof seam leaks
- Poor bonding
- Long-term moisture inside the wall
Delamination is not fixed by simply applying filler outside. The loose panel must be rebonded or the damaged section must be rebuilt. If water is still entering the wall, the leak must be fixed first.
If you see bubbling, soft walls, or large separated areas, call a professional before the damage spreads.
Check Seams, Windows, and Trim After Any Repair
Many fiberglass exterior problems are connected to water leaks.
After repairing exterior damage, inspect nearby:
- Window seals
- Corner trim
- Roof edges
- Clearance lights
- Compartment doors
- Slide-out trim
- Exterior vents
- Awning mounts
- Ladder mounts
If sealant is cracked or separated, water can get behind the fiberglass and create new damage.
A clean fiberglass repair should always include leak prevention.
Common Mistakes to Avoid!
Fiberglass repair is not impossible, but it is easy to do badly.
Avoid these mistakes:
- Applying filler over dirty or glossy surfaces
- Using household caulk instead of RV-safe sealant
- Ignoring cracks that reach through the fiberglass
- Patching over delamination
- Using too much filler without reinforcement
- Sanding through surrounding good material
- Painting before the repair fully cures
- Ignoring the source of water intrusion
- Expecting perfect color match on an aged RV exterior
A quick patch can look acceptable for a few weeks, then crack, bubble, or leak again.
When DIY Repair Is Reasonable
A careful DIY repair may be reasonable for:
- Small chips
- Minor scratches
- Small cosmetic cracks
- Tiny drilled holes
- Light gelcoat damage
This assumes the wall is solid, dry, and not delaminated.
If the damage is only cosmetic, you may be able to repair it with basic fiberglass materials and careful finishing.
When You Should Call a Professional
Professional repair is better when you see:
- Deep cracks
- Holes through the panel
- Large impact damage
- Soft fiberglass wall areas
- Delamination
- Water stains
- Mold smell
- Damage around windows or roof seams
- Previous poor repairs
- Large areas that need paint matching
RV exterior panels are part of a larger wall system. If moisture or structural damage is involved, the repair needs more than surface filler.
Custom way Can Help With RV Fiberglass Exterior Damage
At Custom way, we help RV owners repair, restore, and upgrade exterior and interior RV systems. Fiberglass exterior damage should be handled carefully because a small crack can allow water into the wall and create more expensive problems later.
Our team can inspect the damage, find hidden issues, repair cracks or damaged panels, check for leaks, and make sure the repair is done with materials suitable for RV use.
We can help with:
- RV fiberglass exterior repair
- Crack and impact damage repair
- Exterior panel restoration
- Leak detection
- Trim and seam resealing
- Roof and wall inspection
- Water damage repair
- Delamination evaluation
- Interior wall and flooring repair
- Custom RV renovation
- Electrical, cabinets, plumbing, flooring, roof, and many other RV services
A fiberglass repair is not only about making the outside look better. It is about protecting the structure of the RV from water, vibration, and long-term deterioration.
Final Advice
To repair RV fiberglass exterior damage, start by cleaning and inspecting the area. Identify whether the damage is cosmetic, structural, or related to water intrusion. Small scratches and chips may be repaired with sanding, filler, primer, and finish work. Cracks, holes, and broken fiberglass usually need fiberglass reinforcement with resin and cloth. Delamination or soft wall areas need professional diagnosis.
The earlier you repair fiberglass damage, the easier and cheaper it usually is. If water gets behind the exterior skin, the problem can spread into walls, flooring, insulation, and cabinets.
A clean, properly sealed repair keeps your RV looking good and protects it for the road ahead.