

Water damage in an RV ceiling is a serious issue that should never be ignored. Even a small stain can mean ongoing leaks, hidden rot, mold, or structural weakening. RV ceilings are lightweight and layered, so water spreads faster than most owners expect.
Below is a clear, realistic guide explaining what causes ceiling damage, how repairs are done, and when DIY is not enough.
Common Signs of Water Damage in an RV Ceiling
You may notice:
-
Yellow or brown stains
-
Soft or sagging ceiling panels
-
Bubbling or peeling ceiling material
-
Musty smell
-
Visible mold spots
-
Ceiling flexing when pressed
If the ceiling feels soft, water damage is already advanced.
1. Find and Fix the Leak First
Never repair the ceiling until the leak is fixed.
Common leak sources:
-
Roof seams
-
Vents and skylights
-
AC units
-
Antennas
-
Old roof sealant
-
Sidewall to roof joints
If water is still entering, any ceiling repair will fail.
2. Assess the Extent of the Damage
Ceiling damage can be:
-
Surface-only (cosmetic)
-
Panel damage (soft ceiling board)
-
Structural damage (roof framing or insulation)
Press gently around the stained area:
-
Firm surface usually means minor damage
-
Soft or spongy surface means deeper repair is required
Water often spreads beyond visible stains.
3. Dry the Area Completely
Before any repair:
-
Remove interior trim if needed
-
Use fans and dehumidifiers
-
Let the area dry fully
Trapped moisture leads to mold and future failure.
4. Repair Minor Ceiling Damage
For small cosmetic damage:
-
Clean and treat mold with RV-safe cleaner
-
Lightly sand damaged area
-
Apply stain-blocking primer
-
Paint or apply matching ceiling panel finish
This only works if the ceiling material is still solid.
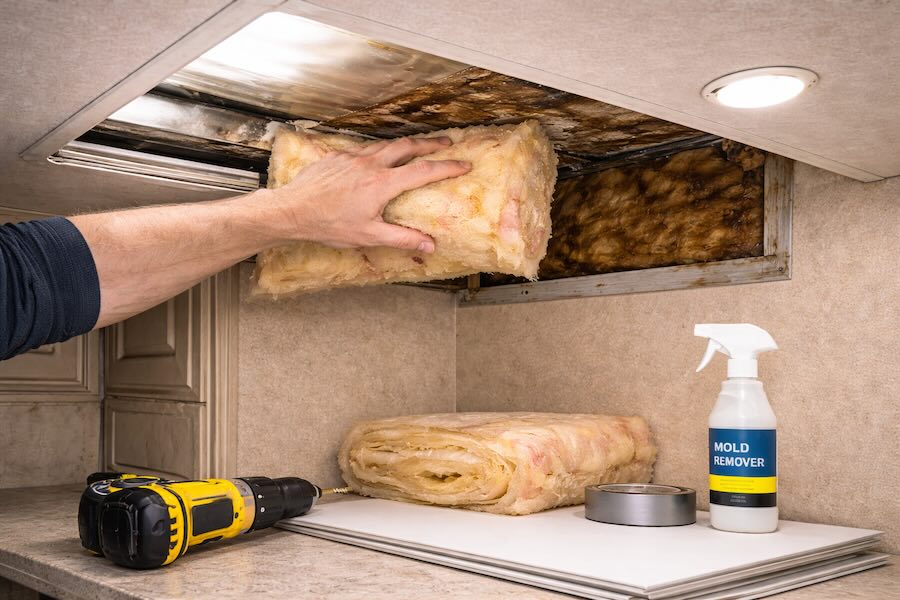
5. Replace Damaged Ceiling Panels
If the ceiling is soft:
-
The damaged panel must be removed
-
Wet insulation must be replaced
-
New ceiling panel installed and secured
-
Seams finished to match existing ceiling
RV ceilings are thin and fragile, so removal must be done carefully to avoid cracking surrounding areas.
6. Inspect Roof Structure and Insulation
Serious leaks often affect:
-
Roof trusses
-
Aluminum or wood framing
-
Insulation layers
If framing is wet or rotted, it must be repaired or reinforced before new ceiling material is installed.
Skipping this step causes repeat failure.
7. Seal and Prevent Future Damage
Once repairs are complete:
-
Reseal roof seams properly
-
Inspect roof every 3 to 6 months
-
Keep sealant flexible and intact
Prevention is far cheaper than another ceiling rebuild.
 Mistakes to Avoid:
-
Painting over stains without fixing leaks
-
Ignoring soft ceiling areas
-
Trapping moisture behind new panels
-
Using household materials not rated for RV movement
-
Delaying repairs until damage spreads
Water damage always gets worse with time.
Repairing water damage in an RV ceiling can range from a simple cosmetic fix to a full structural repair. The most important part is finding the leak and understanding how far the damage has spread. RV construction hides damage well, so surface stains are often just the beginning.
We Can Help!
If you have water damage in your RV ceiling, Custom-way can help.
We understand:
-
RV roof and ceiling construction
-
Hidden insulation and framing layouts
-
Safe access behind ceiling panels
-
Proper repair methods that last
We can find the leak, access any hidden area, repair the structure, and restore your ceiling correctly, not just cover up the problem.
📞 +1 840-205-7314
✉️ customway.ca@gmail.com