How to Replace Camper Roof Vents: Step-by-Step Guide
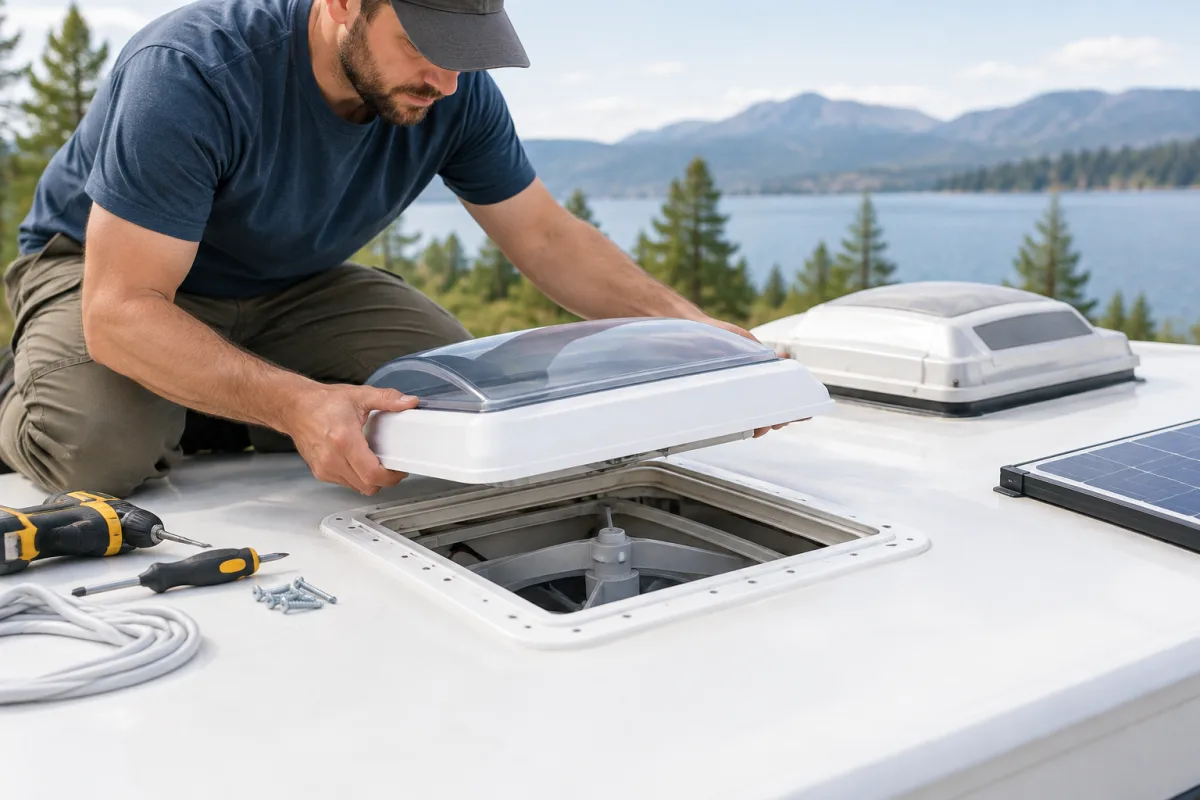
Replacing a complete camper roof vent involves removing the old vent frame, preparing the roof opening, installing a compatible replacement, and resealing the roof penetration. This is different from replacing only a cracked exterior lid, which usually keeps the original frame and hinge.
Before buying a vent, measure the existing opening, check the roof and ceiling thickness, identify the roof membrane, and determine whether the vent is manual or powered. A common RV vent opening is approximately 14 1/4 by 14 1/4 inches, but the actual opening and the replacement manufacturer’s instructions should determine the correct part.
Tools and materials
- Replacement camper roof vent assembly
- Ladder and suitable roof-access equipment
- Screwdriver or nut driver
- Putty knife or plastic scraper
- Measuring tape
- Replacement screws recommended for the vent
- Butyl tape or approved butyl sealant
- Compatible lap or self-leveling roof sealant
- Caulk gun, if required
- Wire connectors and tools for a powered vent
1. Confirm that the complete vent needs replacement
If only the outside lid is cracked, a lid replacement may be enough. The replacement lid must match the existing vent’s dimensions and hinge style. Common hinge designs include three-point, four-point, and continuous hinges.
Replace the complete assembly when the vent frame is damaged, the hinge cannot be repaired, the fan or motor has failed, or the flange no longer seals reliably against the roof.
2. Measure the opening and check compatibility
Measure the roof opening from edge to edge, rather than relying only on the old vent’s advertised size. Also measure the distance from the roof surface to the interior ceiling. The replacement interior garnish must fit this thickness and may need to be trimmed.
Check the replacement vent’s required opening, flange dimensions, screw pattern, wiring requirements, and roof-material compatibility. Do not assume that every vent described as a standard 14-inch model uses exactly the same opening.
3. Disconnect power from a powered vent
For a powered roof vent, disconnect shore power and the appropriate battery connection before removing the vent or handling wiring. Some installation documentation specifically requires disconnecting 120-volt AC power and the positive 12-volt battery terminal before drilling, cutting, or wiring.
Never connect a 12-volt vent fan to 110-volt AC power. If the wiring is damaged, unidentified, or difficult to access safely, have the electrical work handled by a qualified RV technician.
4. Remove the interior garnish
From inside the camper, remove the screws holding the interior trim or garnish. Support the trim as you lower it, especially if the vent has a fan, light, rain sensor, or other wiring attached.
Label the wires before disconnecting them. Keep the screws aside only if the replacement manufacturer confirms that they are suitable; new vents often require different fasteners.
5. Remove the exterior vent assembly
Climb onto the roof using a stable ladder and avoid stepping on unsupported areas or fragile roof accessories. Remove the old sealant around the vent flange and take out the perimeter screws.
Lift the vent carefully. If it is stuck, work a putty knife or plastic scraper beneath the flange gradually. Do not pry aggressively, because that can tear an EPDM or TPO membrane or damage a fiberglass or aluminum roof.
6. Prepare the roof opening
Remove old butyl tape and sealant from the roof surface and opening. Scrape carefully until the flange area is clean, then wipe away residue and allow the surface to dry completely.
Inspect the exposed roof and framing for soft wood, staining, or other water-damage signs. A damaged substrate should be repaired before installing the new vent; otherwise, the flange may not fasten securely or seal evenly.
7. Apply the primary seal
Apply compatible butyl tape or approved butyl sealant beneath the replacement vent flange. Cover the flange’s sealing surface continuously, including corners and screw locations, without leaving gaps.
Sealant compatibility depends on the roof membrane and the vent plastic. Some polypropylene accessories and roof systems require a specific sealant or primer. Do not use silicone automatically: it may not adhere properly to certain RV roof membranes.
8. Install and fasten the new vent
Lower the vent straight into the opening without dragging the sealant across the roof. Align it according to the manufacturer’s instructions, then install the recommended screws gradually in an even pattern.
Tighten the screws enough to compress the butyl seal and secure the flange. Excessive tightening can distort the frame, squeeze out too much sealant, or damage the roof.
9. Seal the flange and screw heads
Apply a compatible lap or self-leveling roof sealant around the exposed flange perimeter and over the screw heads. Use a product approved for both the camper’s roof membrane and the vent material.
Some materials require primer before the specified sealant is applied. Follow the replacement vent and sealant manufacturer’s instructions rather than combining products based only on appearance or convenience.
10. Refit the interior garnish and test the vent
Reconnect the labeled wires if the vent is powered, then install the interior garnish. Trim the garnish only as directed so it sits firmly against the ceiling without distorting the vent frame.
Restore power and test the fan, switch, lid, and any supplied controls. Check that the lid opens and closes freely. After the sealant has cured according to its instructions, inspect the flange and the ceiling around the vent for signs of water entry during the next rain or controlled water test.
When professional replacement is the better option
Professional help is sensible when the roof membrane is torn, the opening framing is soft, the wiring is unclear, or the vent has caused interior water damage. The correct sealant and repair method depend on whether the roof is EPDM, TPO, fiberglass, aluminum, or another material.
Custom way repairs and renovates RVs and camper vans in California, including roof repair, water damage repair, electrical repair, and RV window replacement. The company serves Orange County, Los Angeles, and Riverside County. For a vent replacement involving roof damage or electrical work, contact Custom way at +1 840-205-7314, customway.ca@gmail.com, or visit 17223 Roseton Ave, Artesia 90701.