
An RV converter is a critical part of your electrical system. It converts 120V AC power from shore power or a generator into 12V DC power to run lights, fans, control boards, and to charge your batteries. When it fails, you may notice dim lights, dead batteries, or appliances not working correctly. Here is a clear, safe guide on how to replace an RV converter.
RV Converter Needs Replacement?
Common symptoms include:
-
Batteries not charging while plugged into shore power
-
Flickering or very dim interior lights
-
Converter fan running constantly or not at all
-
Burning smell or unusual heat near the converter
-
Battery voltage stuck below 12.5V when plugged in
If you see melted wires or smell burning, stop immediately and disconnect power.
Tools and Materials You Will Need:
-
Replacement RV converter (same amperage or higher)
-
Screwdrivers
-
Socket set
-
Wire labels or masking tape
-
Multimeter
-
Safety gloves
-
Flashlight
Always match the converter type and output rating to your RV system.
Step 1. Disconnect All Power Sources
This step is mandatory.
-
Unplug shore power
-
Turn off the generator
-
Disconnect the RV battery (negative terminal first)
Never work on a converter with power connected.
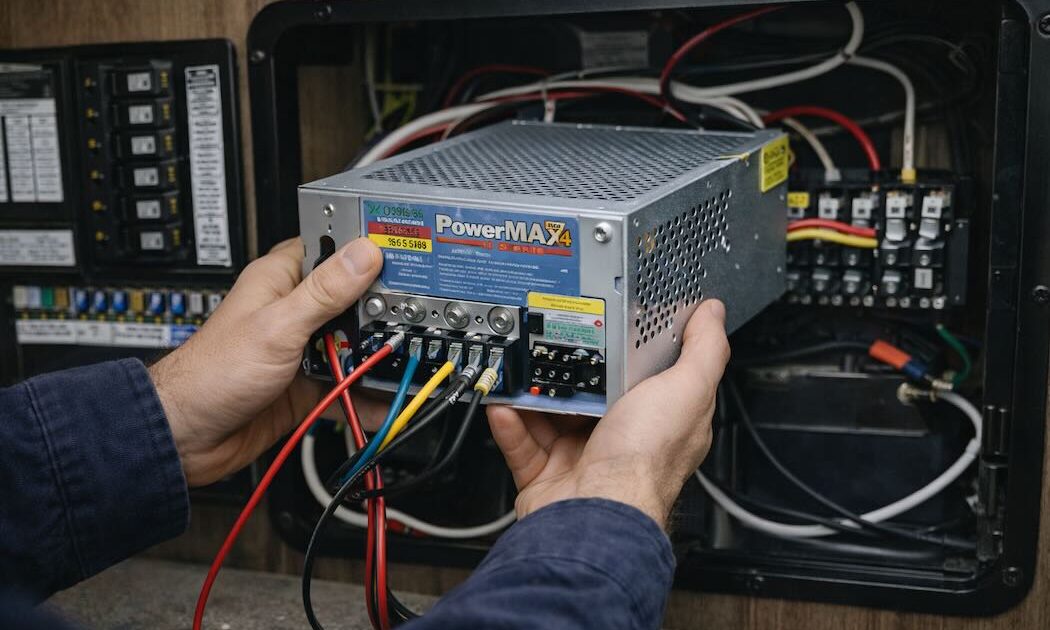
Step 2. Locate the Converter
RV converters are usually found:
-
Behind the breaker panel
-
Under the bed or dinette
-
Inside a cabinet
-
Near the battery compartment
Some RVs have the converter and distribution panel combined into one unit.
Step 3. Label and Disconnect Wires
Before removing anything:
-
Label each wire clearly
-
Take photos for reference
You will typically see:
-
AC input wires (black, white, ground)
-
DC output wires going to the fuse panel
-
Battery positive and negative cables
Disconnect all wiring carefully.
Step 4. Remove the Old Converter
-
Unscrew the mounting screws
-
Slide the converter out of its compartment
-
Inspect surrounding wiring for heat damage
If wires are brittle or discolored, they may need replacement.
Step 5. Install the New Converter
-
Secure the new converter in the same position
-
Ensure proper ventilation around the unit
-
Reconnect wires exactly as labeled
-
Tighten all connections firmly but do not overtighten
Loose connections cause voltage drops and overheating.
Step 6. Restore Power and Test
-
Reconnect the battery
-
Plug into shore power
-
Use a multimeter to check battery voltage
A healthy converter should raise battery voltage to 13.2–14.4 volts depending on charging stage.
Check:
-
Interior lights
-
12V appliances
-
Converter fan operation
Common Mistakes to Avoid:
-
Installing a converter with too low amperage
-
Forgetting to disconnect the battery
-
Reversing polarity
-
Blocking airflow to the converter
-
Ignoring damaged wiring
When You Should Call Professionals?
Replacing an RV converter can be straightforward, but many RV electrical systems are hidden behind panels and tight spaces. Wiring paths are not always obvious, and mistakes can damage batteries, control boards, or the new converter.
We can help!
You can call Custom-way and we will handle the replacement safely.
We know RV electrical layouts, distribution panels, battery systems, and hidden wiring paths, and we can access any internal compartment or electrical cavity without damaging your RV.
📞 +1 840-205-7314
✉️ customway.ca@gmail.com