
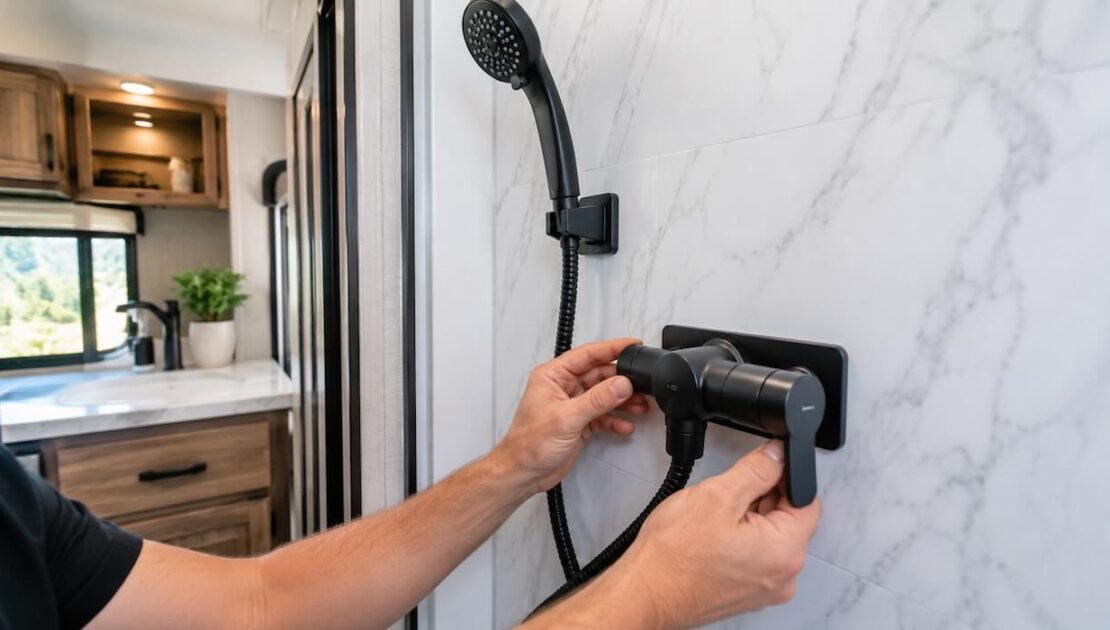
How to Replace an RV Shower Faucet
Replacing an RV shower faucet is one of those repairs that looks simple at first, but it can quickly become annoying if the fittings are tight, the wall access is limited, or the old plumbing has already started to leak.
A shower faucet in an RV works harder than a regular home faucet. It deals with vibration, limited space, plastic plumbing lines, pressure changes, water pump cycling, and temperature swings. Over time, the faucet can crack, drip, lose pressure, or become difficult to control.
If your RV shower faucet is leaking, hard to turn, outdated, or simply uncomfortable to use, replacement can make the bathroom feel cleaner and much more practical.
 When Should You Replace an RV Shower Faucet?
You do not always need to wait until the faucet completely fails. In many cases, early replacement prevents water damage behind the shower wall.
Common signs include:
- Water dripping from the shower faucet
- Loose or cracked handles
- Weak water flow
- Hot and cold water not mixing properly
- Water leaking behind the wall
- Corrosion around fittings
- Old plastic faucet body becoming brittle
- Shower hose connection leaking
- Faucet looks outdated after bathroom renovation
The biggest danger is hidden leakage. If water gets behind the shower wall or under the flooring, a small faucet problem can turn into soft floor repair, wall damage, mold, or full bathroom renovation.
Check the Type of Faucet
RV shower faucets are not always the same as home shower faucets.
Most RV shower faucets are lightweight, compact, and designed for thin walls or shower panels. Many use plastic bodies and threaded fittings connected to PEX or flexible plumbing lines.
Before buying a replacement, check:
- Distance between hot and cold connections
- Wall thickness
- Mounting style
- Hose connection size
- Access panel location
- Existing plumbing type
- Available space behind the wall
Do not buy a faucet only because it looks good. It must match the RV plumbing layout and fit safely in the shower space.
Tools and Materials You May Need:
For a basic RV shower faucet replacement, you may need:
- Screwdriver
- Adjustable wrench
- Pliers
- Towels
- Flashlight
- Replacement RV shower faucet
- New washers or gaskets
- Plumber’s tape if required by fitting type
- Bucket or small container
- Mild cleaner
- Silicone or RV-safe sealant if the mounting area needs sealing
Important: do not overtighten plastic fittings. Many RV plumbing leaks happen because fittings were tightened too aggressively and cracked.
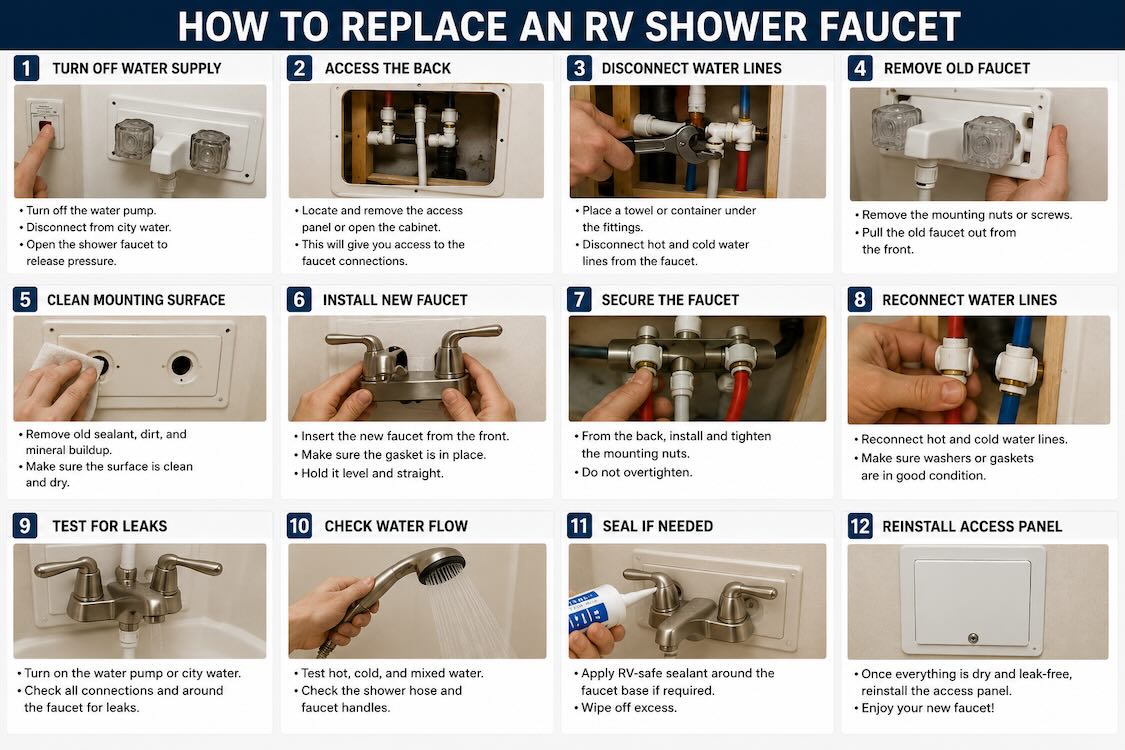
Step 1
Turn Off the Water Supply
Before removing the faucet, turn off all water sources.
Do this first:
- Turn off the RV water pump.
- Disconnect from city water.
- Open the shower faucet to release pressure.
- Open another faucet if needed to drain pressure from the lines.
If the water heater was recently running, be careful with hot water in the lines.
Step 2
Access the Back of the Shower Faucet
Most RV shower faucets are mounted through a thin shower wall or panel. The plumbing connections are usually behind an access panel, inside a cabinet, or behind a removable wall section.
Look for access from:
- Bathroom cabinet
- Closet wall
- Bedroom side panel
- Exterior service panel
- Removable trim panel
If there is no easy access, do not start cutting blindly. Some RVs have hidden screws, clips, or panels that need to be removed carefully.
This is one of the points where professional help can save time and prevent damage.
Step 3
Inspect for Existing Water Damage
Before removing the old faucet, inspect the area around and behind it.
Look for:
- Soft wall material
- Dark stains
- Musty smell
- Wet insulation
- Swollen paneling
- Mold spots
- Loose fittings
- Water marks under the shower
If you find moisture damage, replacing only the faucet may not be enough. The wall, subfloor, or surrounding plumbing may need repair before the new faucet is installed.
Step 4
Disconnect the Water Lines
Place a towel or small container under the fittings. Some water may remain in the lines.
Carefully loosen the hot and cold water connections. If the fittings are plastic, support the faucet body while loosening the nuts so you do not twist or crack the plumbing.
Mark or remember which line is hot and which is cold. Usually hot is on the left and cold is on the right, but previous repairs or modifications can change that.
Step 5
Remove the Old Shower Faucet
After disconnecting the water lines, remove the mounting nuts or screws holding the faucet to the shower wall.
Pull the old faucet out from the front side.
Clean the mounting surface before installing the new unit. Remove old sealant, dirt, mineral buildup, and any damaged gasket material.
A clean surface helps the new faucet sit flat and seal properly.
Step 6
Install the New RV Shower Faucet
Place the new faucet into position from the shower side.
Make sure:
- The faucet sits straight
- Gaskets are properly positioned
- Hot and cold sides match the plumbing
- The hose connection points in the correct direction
- The faucet does not stress the wall panel
From the back side, tighten the mounting nuts by hand first. Then snug them carefully with a tool if needed.
Do not crush the shower wall or overtighten the faucet body.
Step 7
Reconnect the Water Lines
Reconnect the hot and cold water lines.
Check that washers or gaskets are in good condition. If they are old, flattened, cracked, or missing, replace them.
Tighten connections carefully. With RV plumbing, “tight enough” is better than “as tight as possible.”
If a fitting requires plumber’s tape, use it correctly. If the fitting seals with a rubber washer, tape may not be needed and can sometimes make the connection worse.
Step 8
Test for Leaks
Turn the water pump back on or reconnect city water slowly.
Do not close the access panel yet.
Check for leaks while:
- Water pressure builds
- Faucet is off
- Cold water is running
- Hot water is running
- Shower hose is connected
- Faucet handles are moved several times
Use a dry paper towel around fittings to detect small leaks. Even a tiny drip matters in an RV because water can stay hidden inside walls and flooring.
Step 9
Check Water Flow and Temperature Control
After confirming there are no leaks, test the faucet normally.
Check:
- Cold water flow
- Hot water flow
- Mixed temperature
- Shower hose connection
- Shutoff function if the shower head has one
- Water pump cycling behavior
If the pump pulses strangely, pressure is weak, or hot water is inconsistent, the issue may not be the faucet alone. It could be a pump, water heater, clogged line, filter, valve, or pressure regulator problem.
Step 10
Seal and Finish the Area
If the faucet design requires sealing around the mounting plate, apply RV-safe sealant carefully.
Do not block drainage paths or trap water where it should escape. The goal is to prevent water from getting behind the wall while keeping the installation clean and serviceable.
Once everything is dry and leak-free, reinstall the access panel.
Common Mistakes to Avoid!
RV shower faucet replacement is not difficult, but small mistakes can cause big problems.
Avoid these:
- Forgetting to turn off the water pump
- Replacing the faucet without checking for hidden leaks
- Using a household faucet that does not fit RV plumbing
- Overtightening plastic fittings
- Mixing up hot and cold lines
- Ignoring damaged washers
- Closing the wall before leak testing
- Using the wrong sealant
- Cutting panels without understanding the access layout
The most expensive mistake is leaving a small leak behind the wall.
Should You Replace the Faucet Yourself or Call a Professional?
If the faucet is easy to access and the plumbing is in good condition, many RV owners can handle a basic replacement.
But professional service is better if:
- There is no clear access panel
- The fittings are old or brittle
- You see water damage
- The shower wall is soft
- The faucet leaked behind the wall
- The RV has previous plumbing modifications
- You are upgrading the full shower area
- You want a cleaner, more modern finish
A professional can also check whether the faucet problem is connected to other water system issues.
Custom way Can Help With RV Shower Faucet Replacement
At Custom way, we help RV owners replace leaking, outdated, or damaged shower faucets and improve the entire bathroom area.
Our team can handle the job correctly, including access, removal, plumbing inspection, installation, leak testing, and finishing. If we find hidden water damage or weak plumbing connections, we can repair the problem before it becomes more expensive.
We can help with:
- RV shower faucet replacement
- Shower hose and shower head upgrades
- Leak detection
- Plumbing line repair
- Water pump service
- Water heater inspection
- Full RV shower replacement
- Bathroom remodeling
- Flooring and subfloor repair
- Custom interior upgrades
- Electrical, cabinets, roof, flooring, and many other RV services
A faucet replacement may seem like a small job, but it is part of a larger system. A clean, leak-free shower protects your RV interior and makes daily travel much more comfortable.
A Better Shower Starts With a Proper Installation
Replacing an RV shower faucet can refresh the bathroom, stop annoying leaks, improve water control, and protect the walls and floor from moisture damage.
The key is not just installing a new faucet. The key is checking the plumbing, using the right parts, testing carefully, and making sure no water is escaping behind the wall.
If your RV shower faucet is leaking, loose, outdated, or uncomfortable to use, Custom way can help you replace it properly and upgrade the space around it if needed.