
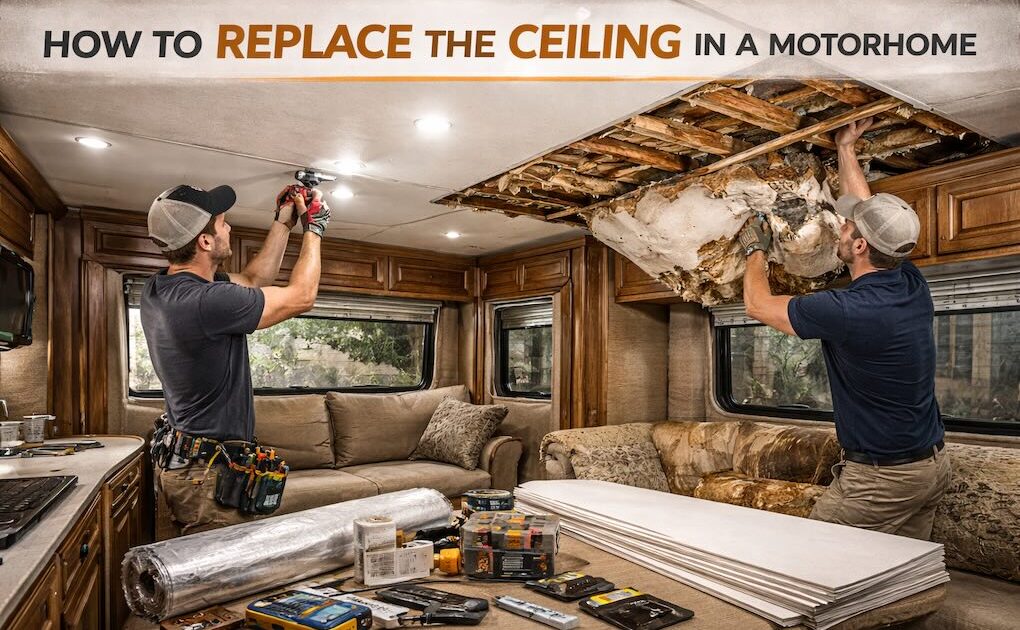
Replacing a motorhome ceiling is not just a cosmetic upgrade. In most cases, ceiling replacement happens after water damage, sagging panels, or delamination. The key is not just installing new material but fixing the root cause and protecting the structure underneath.
Here’s a practical, real-world guide that reflects how this job is actually done.
Step 1: Identify the Cause First
Before removing anything, determine why the ceiling failed.
Common causes:
-
Roof leak around vents or AC unit
-
Failed sealant
-
Window or sidewall leak
-
Condensation damage
-
Structural flexing
If you do not fix the leak first, the new ceiling will fail again.
Step 2: Remove Fixtures and Trim
Turn off all power before starting.
Remove:
-
Ceiling lights
-
AC interior cover
-
Vent trim
-
Speakers
-
Trim molding
Label wiring so reinstallation is easier later.
Step 3: Remove Damaged Ceiling Panels
Most RV ceilings are thin panels attached to wood or aluminum framing.
Carefully:
-
Pry down damaged sections
-
Cut along seams if necessary
-
Remove wet insulation
-
Inspect framing
Be gentle. RV roof structure is lightweight and easy to damage.
Step 4: Inspect Roof Framing
This is critical.
Look for:
-
Rotten wood
-
Rusted aluminum framing
-
Mold
-
Delamination
Replace any damaged framing before installing new ceiling material.
Step 5: Replace Insulation
If insulation is wet, it must be replaced.
Use:
-
Lightweight rigid foam board
-
RV-rated insulation
Avoid heavy residential insulation.
Step 6: Choose New Ceiling Material
Common motorhome ceiling materials include:
Vinyl-coated ceiling panels
Lightweight plywood panels
Beadboard style panels
Fiberglass reinforced panels
Material must be lightweight and flexible.
Step 7: Install New Ceiling Panels
Dry fit first.
Then:
-
Apply RV-rated adhesive
-
Secure with finishing screws into framing
-
Keep seams aligned
-
Avoid over-tightening
Do not glue directly over damaged substrate.
Step 8: Seal and Finish
-
Fill seams
-
Install trim strips
-
Reinstall lights and vents
-
Test wiring
Make sure roof penetrations above are fully sealed.
Common Mistakes
-
Covering mold without removing it
-
Ignoring structural damage
-
Using heavy residential materials
-
Not fixing the roof leak first
-
Screwing into weak substrate
Motorhome ceilings flex during travel. Installation must allow slight movement.
Is This a DIY Job?
Small panel replacements can be DIY if damage is limited.
Full ceiling replacement, especially after water damage, often requires:
-
Roof inspection
-
Structural reinforcement
-
Leak repair
-
Interior finishing skills
Professional work prevents repeat damage.
We Can Help!
If your motorhome ceiling is sagging, stained, or damaged, Custom-way can help.
We understand:
-
Roof structure and framing
-
Water damage restoration
-
Insulation replacement
-
Proper ceiling installation techniques
We can access hidden roof layers, repair structural damage, and install a clean, factory-style ceiling finish.
Call us at +1 840-205-7314
Email customway.ca@gmail.com