
There’s nothing worse than stepping into your travel trailer and feeling it shake every time someone moves. Whether you’re cooking, sleeping, or just relaxing, an unstable trailer can be annoying and even unsafe.
At Custom-way, we help RV owners across California with travel trailer leveling, stabilization systems, and mobile repair services. In this post, we’ll explain how to properly stabilize your travel trailer for maximum comfort—and minimum wobble.
🔧 What Does Stabilizing a Travel Trailer Mean?
Stabilizing a trailer means reducing unwanted movement or sway when the trailer is parked and in use. This is different from leveling, which makes sure your trailer is flat and balanced on uneven ground.
⚠️ Important: Stabilizers are not meant to support the full weight of the trailer—just to stop side-to-side and front-to-back rocking once it’s leveled.
🧰 Tools You’ll Need
To stabilize your trailer properly, you’ll need:
-
Wheel chocks
-
Leveling blocks or ramps
-
Scissor or electric stabilizer jacks
-
Optional: X-chocks (between tires) for dual-axle trailers
-
Optional: Stabilizer jack pads (for soft ground)
How to Stabilize Your Travel Trailer
1. Park on Solid, Level Ground
Try to find the flattest spot at your campsite. The more level your base is, the easier it will be to stabilize.
2. Chock the Wheels
Before you unhook or drop jacks, place wheel chocks on both sides of at least one trailer tire to prevent rolling.
🔧 Custom-way Tip: Use heavy-duty rubber or metal chocks—not plastic ones that can crack over time.
3. Level the Trailer (Side to Side)
Use leveling blocks or ramps under the wheels to get the trailer level from left to right. Use a bubble level on the floor inside or near the axle.
4. Unhook and Level Front to Back
Once side-to-side is good, use the tongue jack to adjust the front height until the trailer is level front to back.
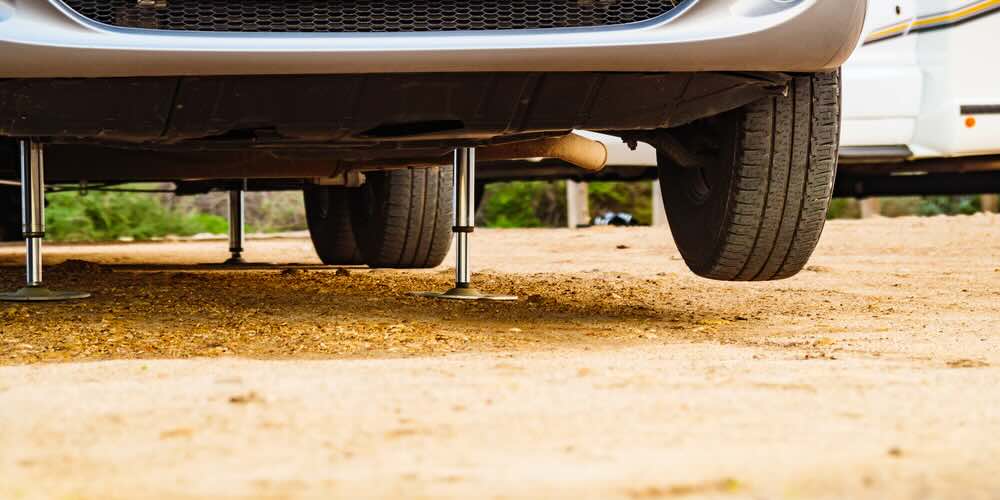
5. Lower the Stabilizer Jacks
Now drop the scissor jacks (manual or electric) at each corner of the trailer. Make sure they make firm contact with the ground or a jack pad.
-
Don’t over-tighten — you’re stabilizing, not lifting.
-
Add pads if the ground is soft or uneven.
6. Add X-Chocks for Extra Stability (Optional)
If you have a dual-axle trailer, install X-chocks between the tires. They press outward to reduce motion when walking inside the trailer.
7. Test and Adjust
Step inside and move around. If you still feel too much shake, recheck the jack contact points or add slide-out supports if applicable.
⚙️ Extra Stabilizing Tools Worth Considering
| Tool/Accessory | What It Does |
|---|---|
| X-Chocks | Reduces tire movement side-to-side |
| Slide-out stabilizers | Adds support under slide-outs |
| Jack pads | Prevent sinking in soft soil or gravel |
| Permanent stabilizers | Replace manual jacks for faster setup |
| Hitch locks | Minimizes movement from hitching point |
🛠️ Professional Trailer Stabilization Service in California
Not sure if your trailer setup is right? Need help installing stabilizer jacks, slide-out supports, or automatic leveling systems?
At Custom-way, we offer:
-
Mobile trailer stabilization service
-
Manual to electric jack conversions
-
Custom stabilization system upgrades
-
Inspection for frame or suspension issues
📍 Serving all of Southern California, including Los Angeles County, Orange County, and surrounding areas.
💡 Why Stabilization Matters
-
Prevents motion sickness and sleep disruption
-
Protects slide-out mechanisms and furniture
-
Reduces stress on jack points and tires
-
Keeps your RV feeling solid and secure
Whether you’re weekend camping or full-timing in your trailer, a stable setup is essential.
📞 Let Custom-way Stabilize Your Ride
Don’t waste time dealing with shaky floors or wobbly steps. Custom-way offers expert travel trailer stabilization services—fast, mobile, and done right.