
Installing a roof vent in a camper van is one of the most important upgrades for comfort and safety. Proper ventilation removes heat, moisture, and odors, prevents condensation, and dramatically improves air quality inside the van. Unlike standard campers, camper vans usually have metal roofs, which means cutting, sealing, and corrosion protection must be done correctly.
This guide explains how roof vent installation in a camper van really works and what you must consider before starting.
Why a roof vent is essential in a camper van
Without a roof vent, camper vans quickly become hot and humid, especially during summer or when cooking inside.
A roof vent helps to:
-
Remove hot air from the ceiling area
-
Reduce condensation and mold risk
-
Improve airflow when windows are open
-
Support heating and cooling systems
For full-time or frequent travel, a roof vent is not optional – it is essential.
Choosing the right roof vent
Most camper van roof vents use a standard 14×14 inch opening, which simplifies installation and replacement.
Popular options include:
-
Manual roof vents
-
Powered roof vents
-
High-performance fans (Maxxair-style, Fantastic-style)
Powered vents are highly recommended for camper vans because they actively pull air out, even when the vehicle is stationary.
Preparing the camper van roof
Camper van roofs are typically steel or aluminum. Cutting them incorrectly can cause rust and structural issues.
Preparation steps include:
-
Measuring and marking the opening precisely
-
Checking for roof ribs and wiring
-
Protecting the interior from metal debris
Once metal is cut, exposed edges must be treated to prevent corrosion.
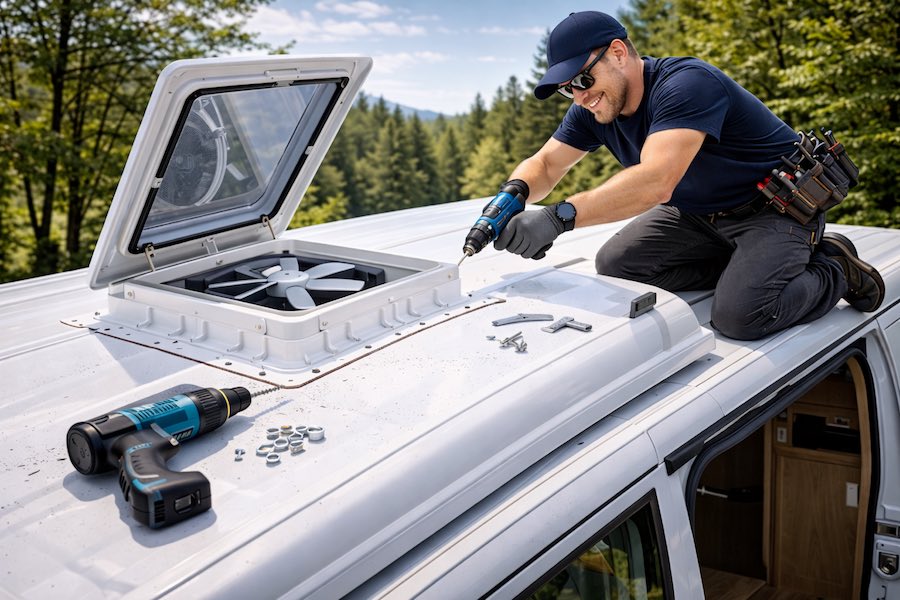
Cutting and framing the roof opening
The roof opening must be reinforced to support the vent and prevent flexing.
Proper installation includes:
-
Clean, straight cut
-
Wooden or metal framing ring
-
Even surface for the vent flange
Skipping reinforcement often leads to leaks or warped vent frames.
Sealing and waterproofing
Sealing is the most critical part of roof vent installation.
Professional sealing includes:
-
RV-grade butyl tape under the flange
-
Even torque on mounting screws
-
UV-resistant lap sealant on top
Household silicone sealants are not suitable and usually fail within a year.
Electrical connection (for powered vents)
Powered roof vents require a 12V connection.
Important considerations:
-
Proper fuse protection
-
Correct wire gauge
-
Clean routing to avoid sharp edges
Incorrect wiring can cause fan failure or electrical issues later.
Common mistakes to avoid
-
Cutting through roof ribs without planning
-
Skipping rust protection on cut edges
-
Using cheap sealants
-
Over-tightening screws and warping the flange
-
Installing vents too close to roof edges
These mistakes are the most common causes of leaks and long-term damage.
Roof vent installation by Custom-way
For a clean and long-lasting installation, Custom-way provides professional camper van roof vent installation.
Custom-way focuses on:
-
precise roof cutting
-
corrosion protection
-
professional sealing
-
vibration-resistant mounting
This approach ensures the roof vent stays leak-free and reliable for years.
Installing a roof vent in a camper van is one of the smartest upgrades you can make. When done correctly, it improves comfort, protects the interior, and supports other systems like heaters and AC units. The key is precision, proper sealing, and understanding how camper van roofs differ from standard RVs.