How to Remove an AC Unit from a Camper Safely
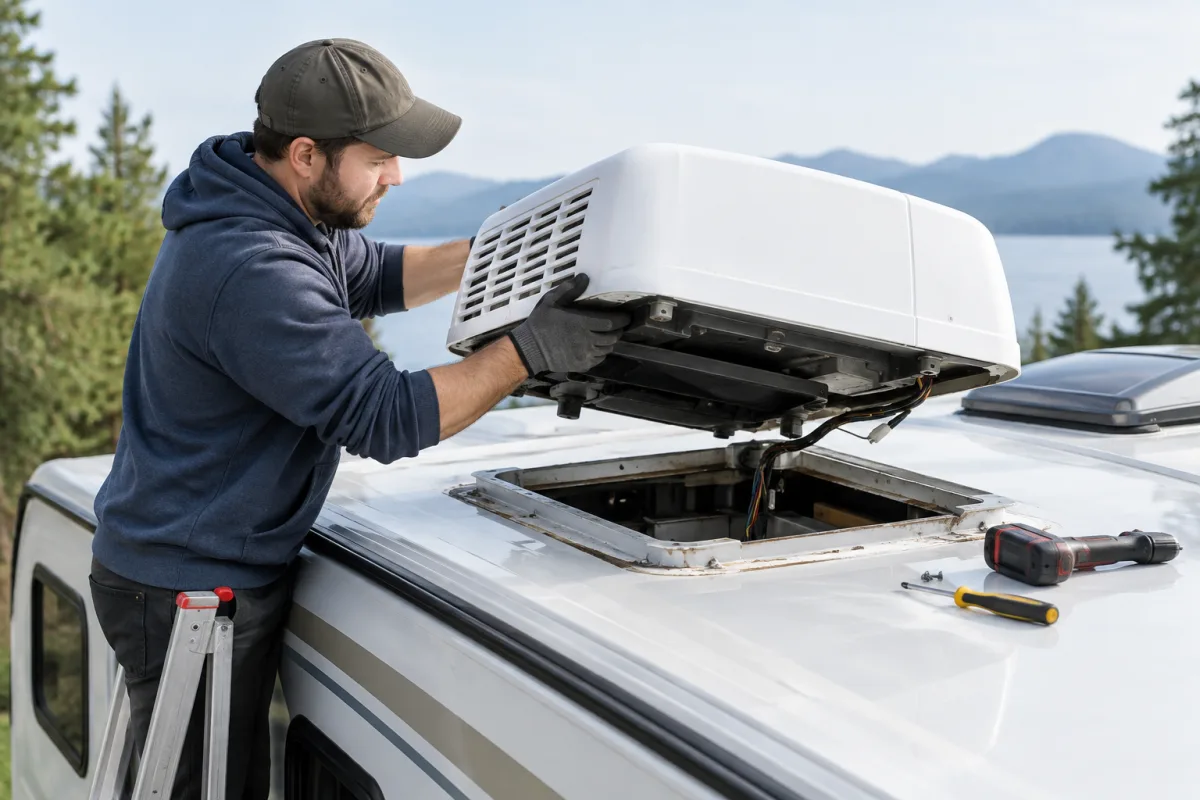
To remove a typical rooftop AC unit from a camper, disconnect every power source, remove the interior mounting hardware and wiring, separate the unit from its roof seal, and lift it straight up with at least two people. The exact bolts, connectors, gasket and lifting method vary by camper and air-conditioner model, so check the manufacturer’s service or installation instructions first.
What you will need
- Screwdrivers and the correct socket or wrench set
- Non-damaging trim or sealant removal tools
- Electrical tester suitable for the system
- Work gloves and eye protection
- Roof-protection boards or suitable padding
- At least one additional person to help lift and lower the unit
- A controlled lowering method if the unit must come down from the roof
1. Identify the air-conditioner and prepare the work area
Confirm that you are removing the complete rooftop assembly, not only the interior ceiling panel. Locate the model information and review the relevant instructions before loosening any fasteners. Clear the area inside and outside the camper, and plan where the heavy unit will be placed after removal.
Rooftop air conditioners are heavy and awkward to handle. Protect the roof membrane with boards or padding, but do not place loads where they could damage vents, skylights or other roof equipment.
2. Disconnect and verify all power sources
Turn off and disconnect shore power. Switch off the generator, and isolate the camper battery or the relevant DC supply. A wall switch or thermostat is not enough because the unit may still receive power from another source.
Prevent anyone from restoring power while work is underway. Use appropriate lockout or tagging procedures where applicable, then test the wiring and unit to verify that it is de-energized before touching the connections. Do not continue if you cannot confidently identify every power source.
3. Remove the interior air-distribution cover
From inside the camper, remove the interior return-air grille or ceiling assembly. Keep the screws organized because some may be different lengths. Work carefully around plastic clips and the thermostat or control wiring.
Once the cover is removed, photograph or label the wires before disconnecting them. Release the wiring from its clips and disconnect the connector or terminals without pulling on the conductors.
4. Remove the interior mounting hardware
Most standard rooftop units are held to the roof by an interior mounting plate and long bolts or similar fasteners around the roof opening. Support the hardware as you loosen it so it does not fall or strain the wiring.
Remove all mounting bolts and confirm that no cable, bracket or duct component is still attached to the air-conditioner. Do not try to lift the exterior unit while a fastener or wire remains connected.
5. Separate the unit from the roof seal
From the roof, inspect the perimeter of the air-conditioner. The unit is normally sealed against the roof with a gasket or compatible sealant. Cut or gently separate the exterior seal with a suitable non-damaging tool.
Do not pry aggressively against the roof membrane or slide the unit across the roof. If the gasket is stuck, work around the perimeter gradually rather than applying force at one corner.
6. Lift and lower the AC unit
Have at least two people lift the unit straight up from the roof opening. Keep the load level and communicate clearly while moving it. Never drop the unit over the roof edge or slide it across the camper.
Use a controlled lowering method if the unit must be brought to the ground. Keep people clear of the area below, and place the assembly on a stable surface once it is down.
Important safety limits
- Do not cut refrigerant tubing or open the sealed refrigeration circuit just to remove the appliance.
- If the system is permanently connected, unusually configured or difficult to isolate, use a qualified technician for the electrical and refrigeration work.
- Stop if the roof structure appears damaged or cannot safely support the work area.
- If power must be restored for testing, clear the area first, keep people away from moving or energized parts, perform the test, then de-energize the system and reapply the energy-control measures before continuing.
Inspect the roof after removal
After the unit is removed, inspect the roof opening, surrounding membrane and roof structure for water damage, soft areas or cracked sealant. Remove old sealant only in a way that is suitable for the camper’s roof material.
If you are installing another unit or closing the opening, use a gasket and sealant compatible with the roof membrane and follow the replacement manufacturer’s instructions. The opening should not be left exposed to rain while the camper is unattended.
When professional help is the better option
Professional removal is advisable when the camper has unknown wiring, a damaged roof, a permanently connected system, limited roof access or an AC unit that cannot be safely lowered. Custom way repairs and renovates RVs and camper vans in California, including roof repair, water damage repair and electrical repair. The team serves Orange County, Los Angeles and Riverside County.
For help with a difficult removal or related roof and electrical work, contact Custom way at +1 840-205-7314, email customway.ca@gmail.com, or visit 17223 Roseton Ave, Artesia 90701.