How to Remove a Shower Drain in a Camper
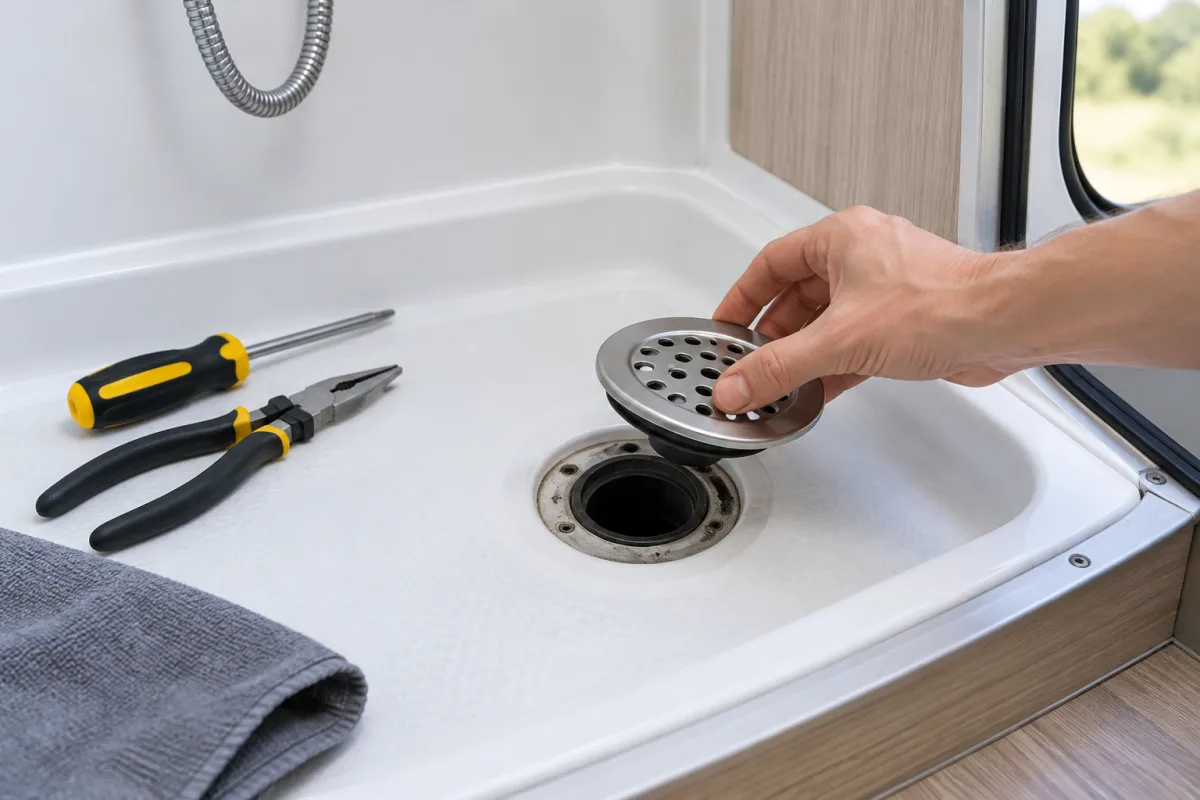
To remove a shower drain in a camper, first take out the drain cover or strainer. If the complete drain assembly must come out, access the underside of the shower pan, disconnect the drain pipe or trap, hold the drain body, and turn the drain flange counterclockwise.
Before removing the drain
- Identify your camper’s make, model, and year if possible.
- Check the owner’s manual before applying force.
- Empty or isolate the gray-water system.
- Place a container and towels below the drain because residual water may spill.
- Inspect the underside to determine whether the camper uses a conventional trap, a waterless HepvO-style trap, or a drain pump.
Drain covers vary. Some snap into place, while others screw into a threaded drain body. Do not pry aggressively, because the shower pan may be made from fiberglass or plastic and can crack.
Removing the cover for cleaning
- Remove the visible screws if the cover is screwed down.
- If there are no screws, gently lift or twist the strainer according to its design.
- Pull out hair and debris with needle-nose pliers or gloved fingers.
- Clean the opening and check that water flows freely.
If the problem is only a clog, removing the cover is usually sufficient. Removing the complete drain body is unnecessary and creates a greater risk of damaging the shower pan or its seal.
Removing the complete shower drain assembly
- Remove the strainer or cover from above the shower pan.
- Find the drain connection underneath the shower. An inspection panel, cabinet, belly material, or part of the drain line may need to be removed for access.
- Place a container under the connection.
- Disconnect the drain pipe, trap, waterless trap, or pump connection, depending on the camper’s design.
- Hold the lower drain body so it cannot rotate.
- Turn the drain flange counterclockwise from above the shower pan.
- Lift the drain assembly out and remove old sealant or gasket material from the opening.
Which tool should you use?
A dedicated drain key or drain wrench is the safest option because it grips the drain more securely. In an emergency, needle-nose pliers inserted into the drain’s crossbars may provide enough leverage, but slipping pliers can damage the drain or shower pan. Avoid using excessive force if the fitting does not turn.
Important camper-specific checks
Unlike a house shower, a camper drain may lead directly toward the gray-water holding tank, connect to a drain pump, or use a waterless HepvO-style trap. These layouts do not all disconnect in the same way. Confirm the plumbing arrangement before removing fittings or cutting access panels.
The exact drain size, tool size, gasket, and sealant cannot be determined for every camper without the make, model, year, and a view of the drain. Replacement parts should match the original assembly and the shower-pan thickness.
When professional help is the better option
Stop if the drain body spins without loosening, the shower pan begins to flex, or the underside is inaccessible. A leaking connection can damage flooring and cabinetry, while forcing a seized fitting may crack the pan.
Custom way repairs and renovates RVs and camper vans in California, including water damage repair, flooring, plumbing-related renovation work, and other camper restoration needs. The company serves Orange County, Los Angeles, and Riverside County. You can visit Custom way at 17223 Roseton Ave, Artesia 90701, or call +1 840-205-7314. Email: customway.ca@gmail.com.
If the drain cannot be removed safely or signs of leakage and water damage are already present, contact Custom way to arrange an RV repair assessment.